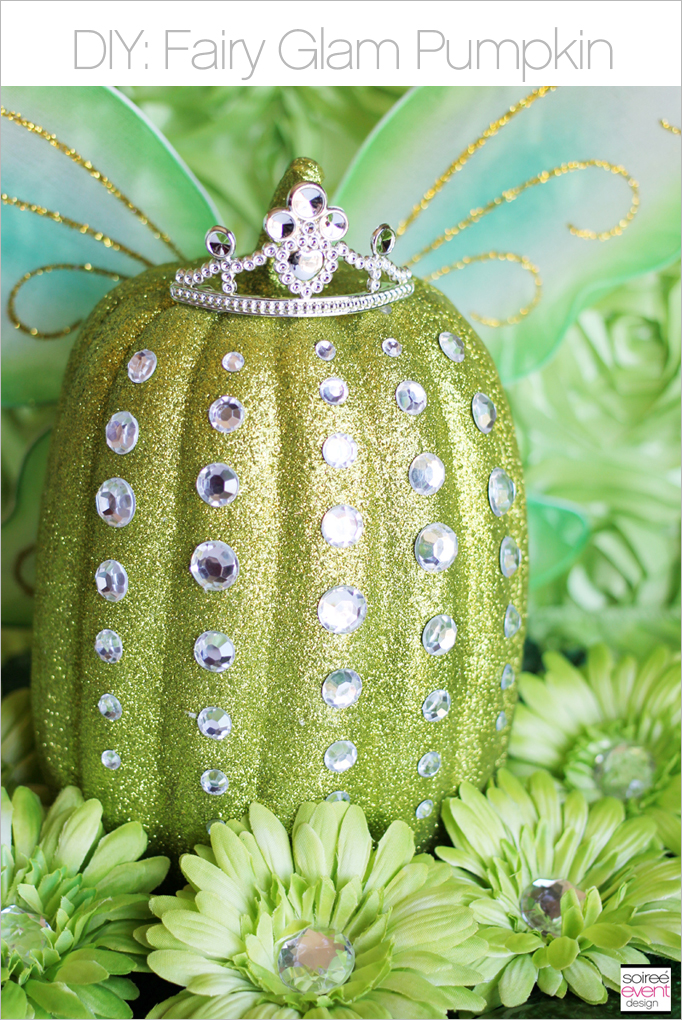
Hey party peeps!
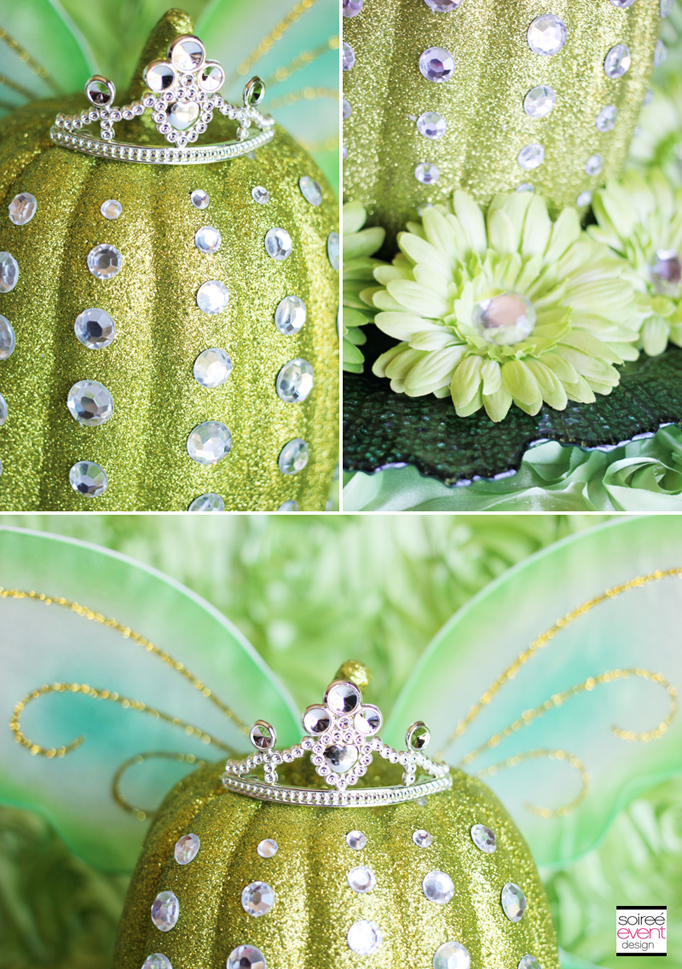
I’m so excited to share with you my DIY tutorial on How to Make a Fairy Pumpkin just in time for your “non-spooky” Halloween decor! This is particularly great for those with young girls who simply don’t want a scary Halloween party or decor in your house. Check out how I made this fabulous Fairy Pumpkin for under $10!
HOW DID SHE DO THAT?
First of all, let me say that this idea all started when I was asked to be part of a team of bloggers participating in this year’s 13 Days of Handmade Halloween blog series over on Cupcake Wishes and Birthday Dreams. There are some really fabulous Halloween DIY projects being showcased this year. Click here to check them out. I sat for a while trying to come up with some ideas and gave up!
So, I did what I always do when I have a creative block…I get out and go somewhere. This time is was a trip to Target to pickup Pull-Ups for my son (I know…glamorous). As I was walking into the store there it was…my nemesis…the Target Dollar Spot! That is just the area that calls (sometimes yells) my name as I walk into Target…pulling me in to look (okay..okay…BUY) lots of cool stuff I absolutely need (okay, WANT).
That day, a glittery green pumpkin sitting in the Dollar Spot section of Target was it! A spark of inspiration! I had to have it. What a timesaver that I didn’t have to hand glitter a plain craft pumpkin! As a busy mom of 5 (3 of which are still home with me) I welcome any and ALL timesavers! The green color sparked a fairy theme and I knew I had some mini fairy wings in my inventory for a Fairy party that I haven’t used yet, so it just seemed like a perfect match. My daughters love fairies, so this seemed like a great idea for a non-spooky Halloween decoration this year.
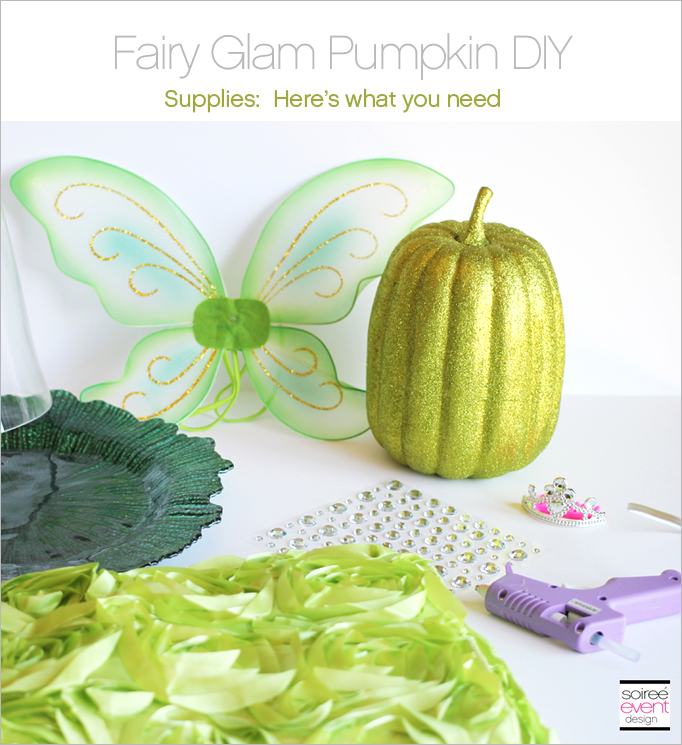
Here’s what you’ll need:
$2 mini fairy wings
$3 green glitter pumpkin
$1 tiara
.70¢ 1 pack of clear rhinestone stickers (Michaels…60% off in the Halloween section)
glue gun (already own but available in Michaels)
scissors (already own but available in Michaels)
misc. decorative items to style your pumpkin when it’s finished (already own: charger plate, rosette table linen, rhinestone flowers)
HERE’S HOW YOU DO IT:
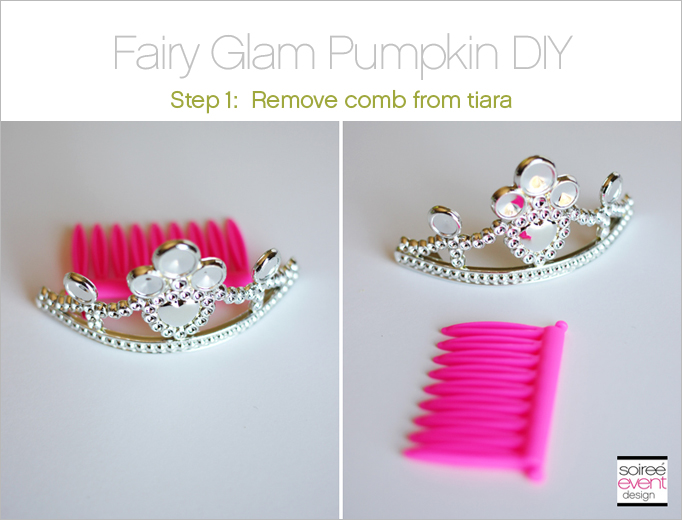
Step 1: Remove the comb from the tiara
Detach the pink comb from the tiara and discard it. It’s so simple to do. It just pops right off. These are actually party favors and come 4 to a pack.
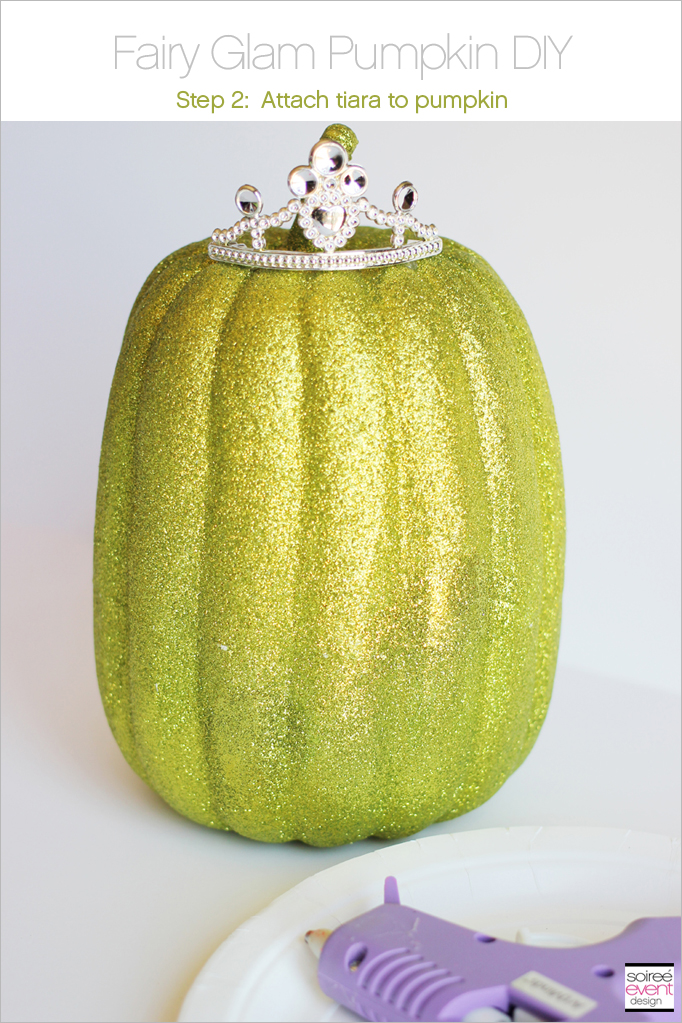
Step 2: Attach the tiara
Using the glue gun, attach your tiara on the top center of the pumpkin in front of the pumpkin’s stem.
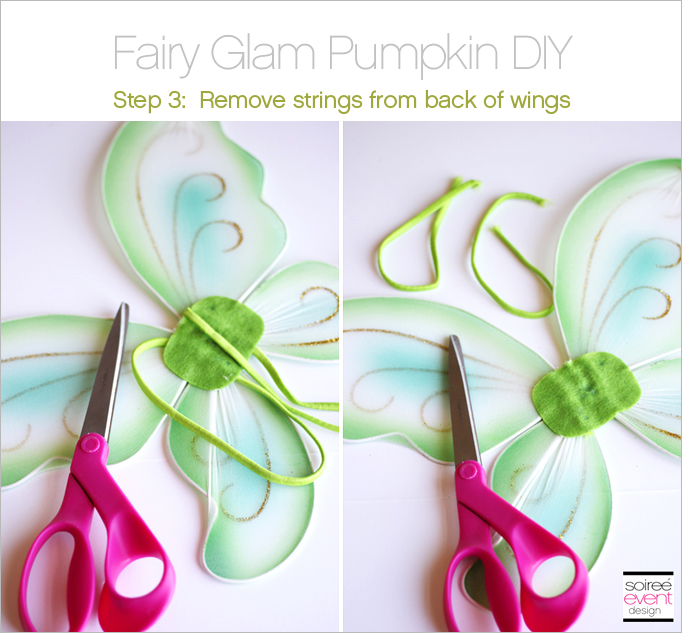
Step 3: Remove strings from wings
There are two sets of strings on the wings that are there to hold the wings onto a person’s back. Since we don’t want them hanging down, simply cut them off.
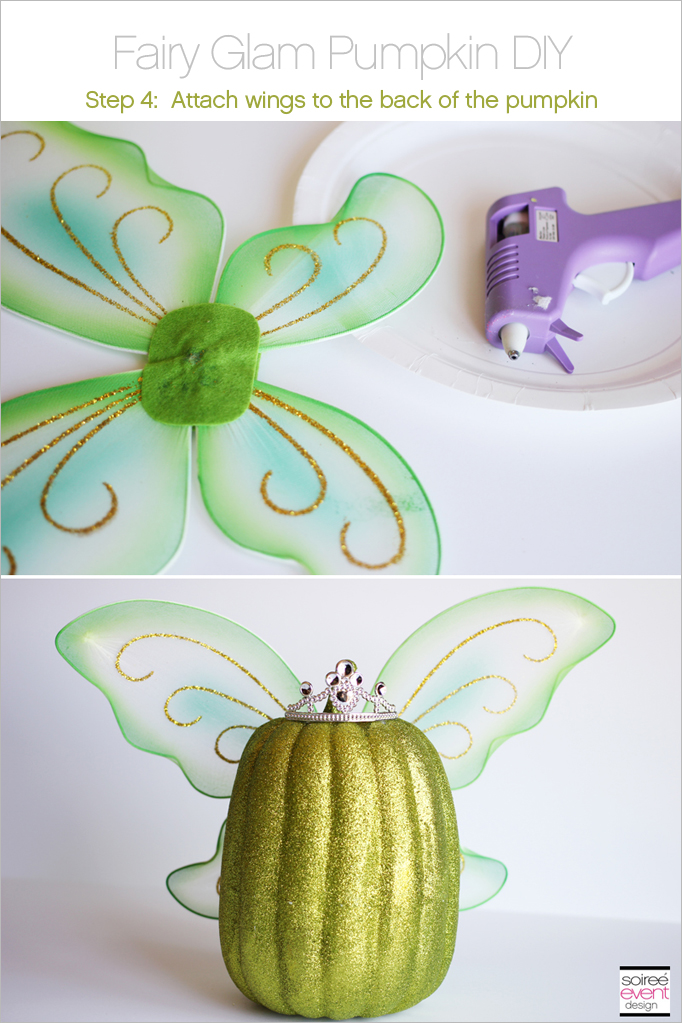
Step 4: Attach the wings
Place a good amount of hot glue on the front green middle patch on the wings and attach them to the center of the back of the pumpkin. Be sure to have the pattern on the wings facing the front of the pumpkin so you can see the pretty glittery designs on the wings when you are facing the front of the pumpkin.
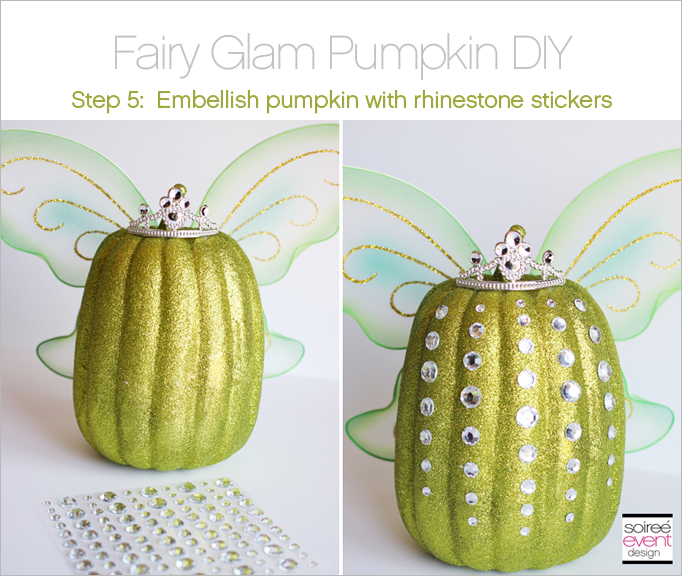
Step 5: Embellish your pumpkin with rhinestone stickers
Be creative! You can come up with all kinds of really cool designs! I used these rhinestone stickers from Michaels and totally scored on them! They were included in the 60% off bins for Halloween decor! I am a total fan of rhinestone stickers….I have little patience for hot glue guns when adhering rhinestones. Total timesaver…Just peel and stick!
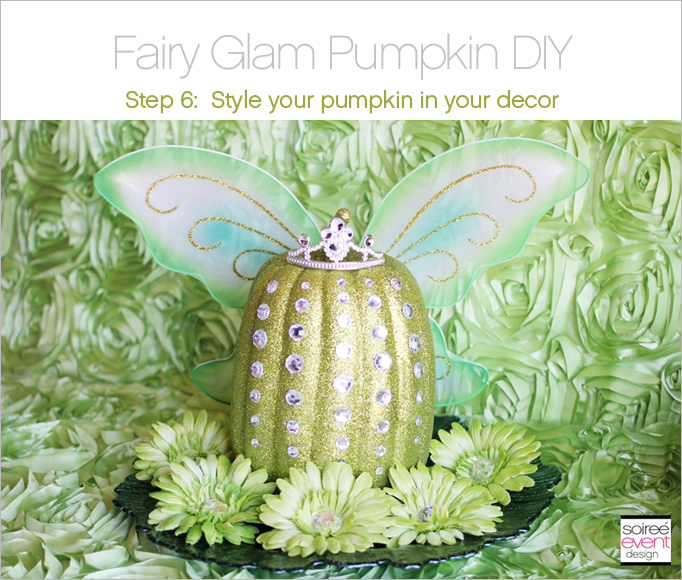
Step 6: Style your pumpkin
All that’s left to do is style your glam fairy pumpkin in your Halloween party design or dining table. Here I placed my pumpkin on a dark green glass flora charger plate then placed these fabulous rhinestone flower clips all around the base of the pumpkin. How gorgeous does it all look displayed on this light green rosette table linen!
WHERE DID SHE GET THAT?
– Styling & photography: Soiree Event Design
– Rhinestone stickers: Michaels
– Green glittered pumpkin: Target
– Green glass flora charger: Koyal Wholesale
– Green rosette table linen: Efavormart
– Tiara: Dollar Tree
– Wings & rhinestone flowers: Halo Heaven
Want to get more of my tips? Be sure to SUBSCRIBE to my blog so you can get all my blog posts delivered right to your email’s inbox so you won’t miss a thing! Subscribing is easy! Just enter your email address in the above right corner of this page and be sure to confirm your email once you get our confirmation to your inbox! That’s it!
Happy Halloween!
Tonya
This is so cute and I’m sure my daughter would adore it! It looks like something we could make together. Thanks for sharing the instructions!
Very cute pumpkin. I have never seen a Fairy Pumpkin before – very cute.
OMG! Your fairy pumpkin looks so pretty with all those glitters!
now that is one pumpkin you are not going to want to throw away after Halloween.
So talented! From your themes and ideas to your photography! I just love this! SO COOL!
What a unique and beautiful pumpkin idea. My boys would probably kill me if I tried to bring it in our home, but I think it’s adorable.
Awww… I want a fairy pumpkin now!! We are doing ours this weekend. Guess who just added a couple items to the shopping list? This girl! Totally doing this! 🙂
Now that is a fancy pumpkin, my daughter would love this esepcially all the sparkly on it, she is all about that!
This is the cutest! I’d love to make this with my daughter.
You always do such great work! I love this fab pumpkin!
I just showed this to my daughter! She can’t wait to make one!
LOVE it! It’s my resolve to be craftier, although I haven’t made any progress yet, LOL.
That is really cute. I haven’t seen one of those before.