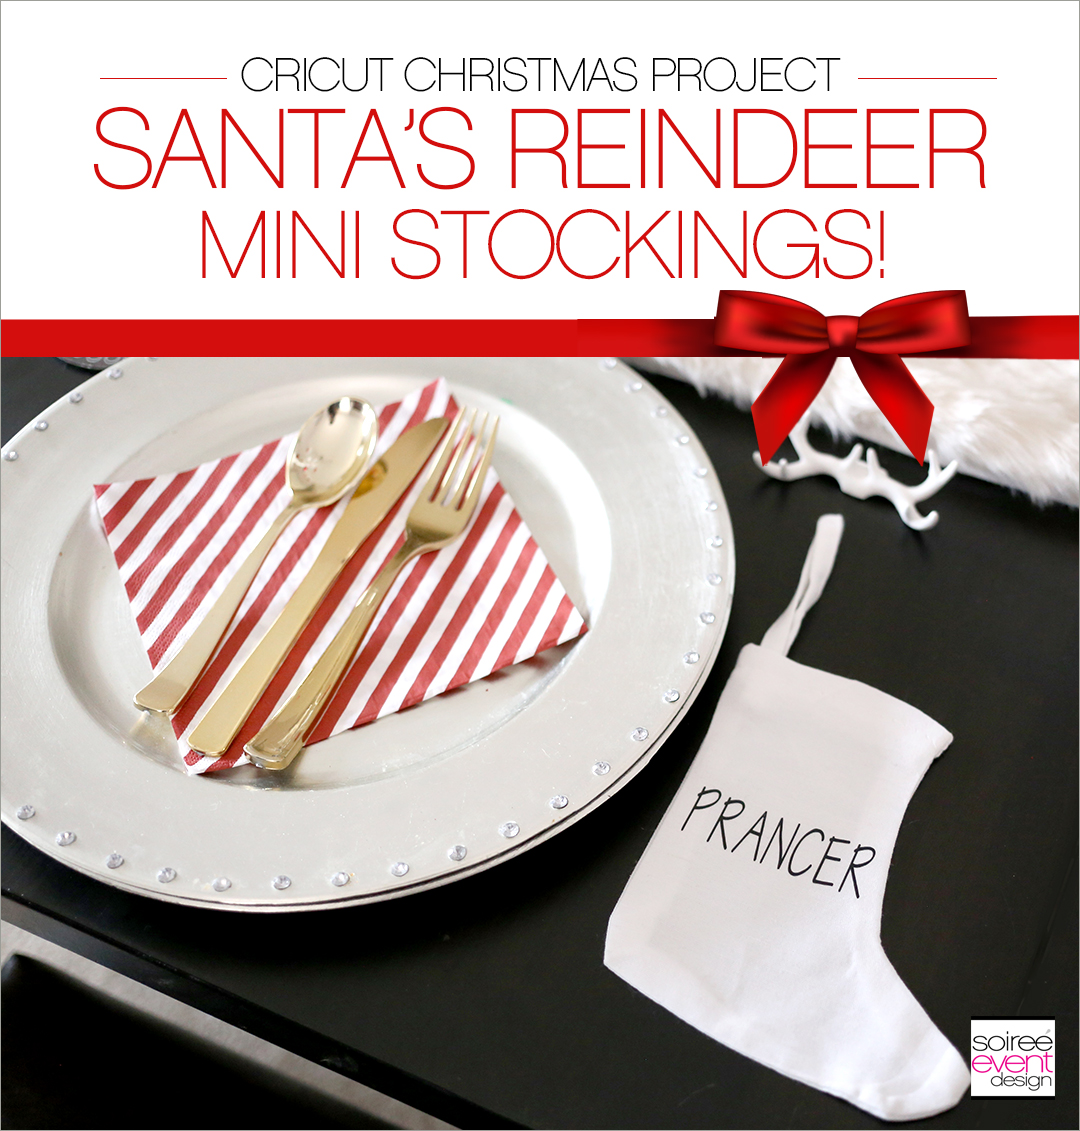
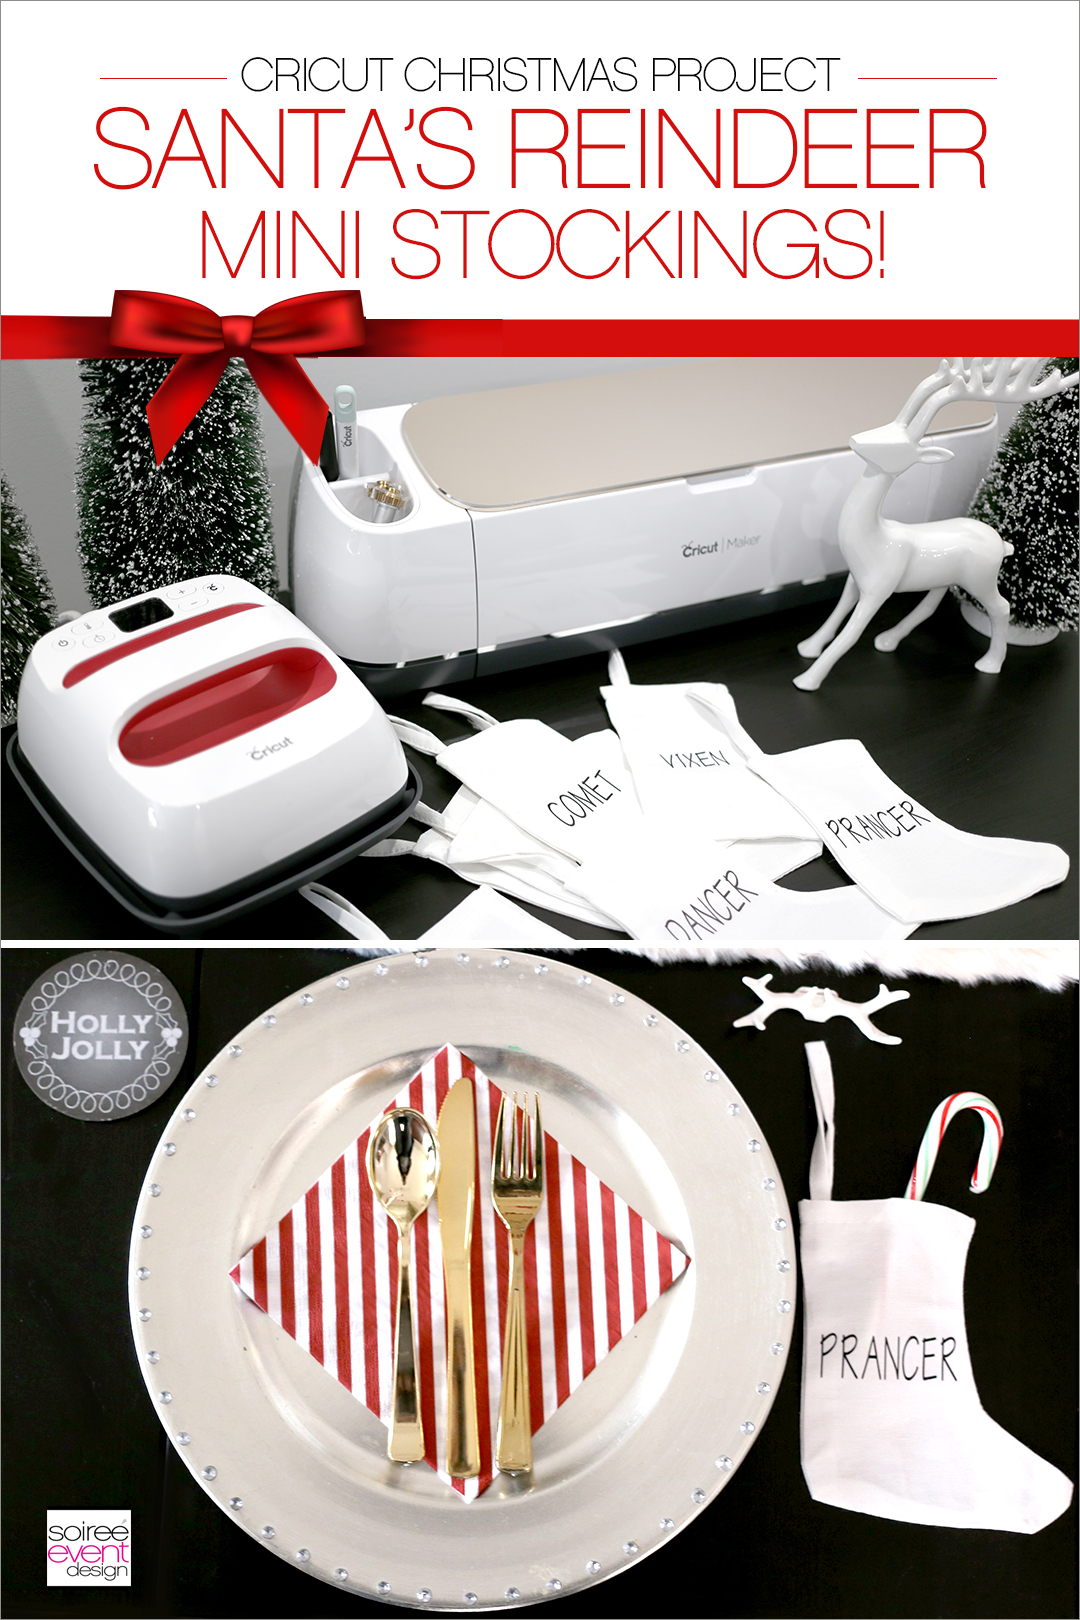
Happy Holidays party peeps! The day after Thanksgiving I was on a mission to decorate my house for Christmas. I couldn’t wait to fire up my brand new CRICUT MAKER to see what I could make to add to my Christmas decor this year. Today I’m going to share with you these super cute SANTA’S REINDEER MINI STOCKINGS that I made with my Cricut Maker and Cricut Easy Press 2 to add a whimsical touch to my holiday dining table. This is a sponsored conversation written by me on behalf of Cricut. The opinions and text are all mine. #CricutMade #Cricut #ad
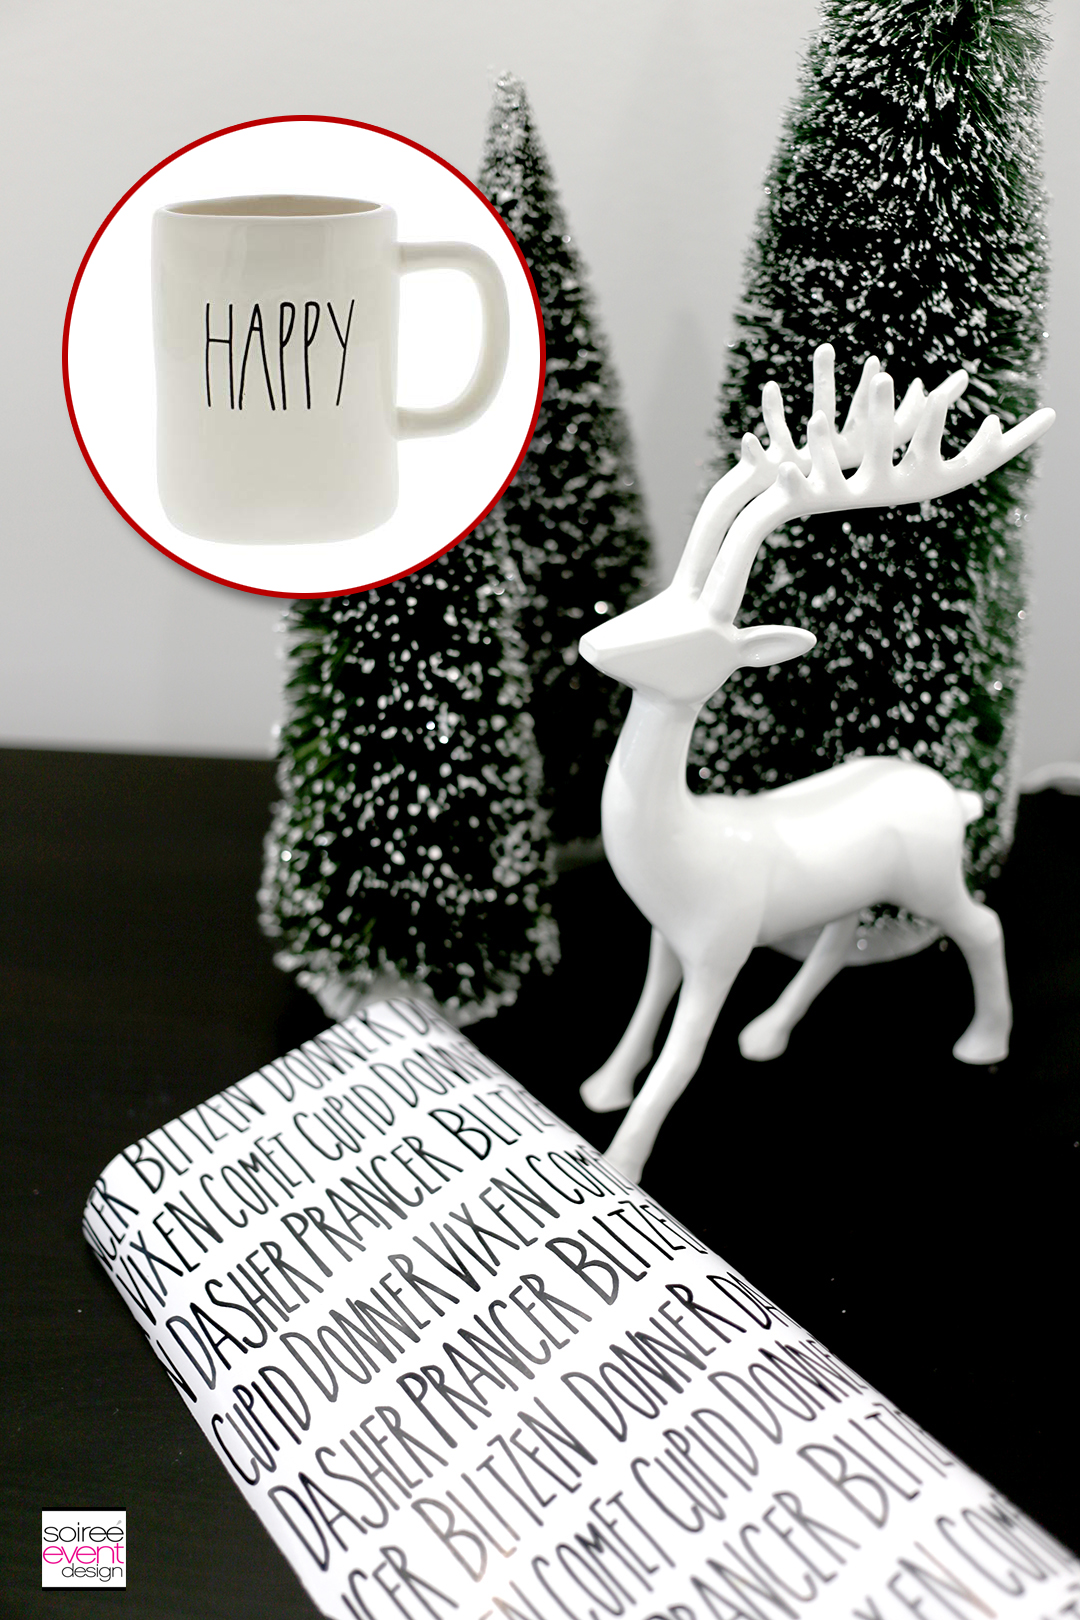
THE INSPIRATION – WRAPPING PAPER!
Every year, I find something new that I love and want to use as inspiration for my Christmas decor. This year, I LOVE, LOVE, LOVE the simplicity of the black and white Rae Dunn mugs and found this wrapping paper that reminded me so much of the mugs. I loved how it used the reindeer names which became the inspiration for this project. I’ll share with you in a different post how I used the wrapping paper in the decor!
CRICUT EASY PRESS 2 NOW COMES IN 3 SIZES!
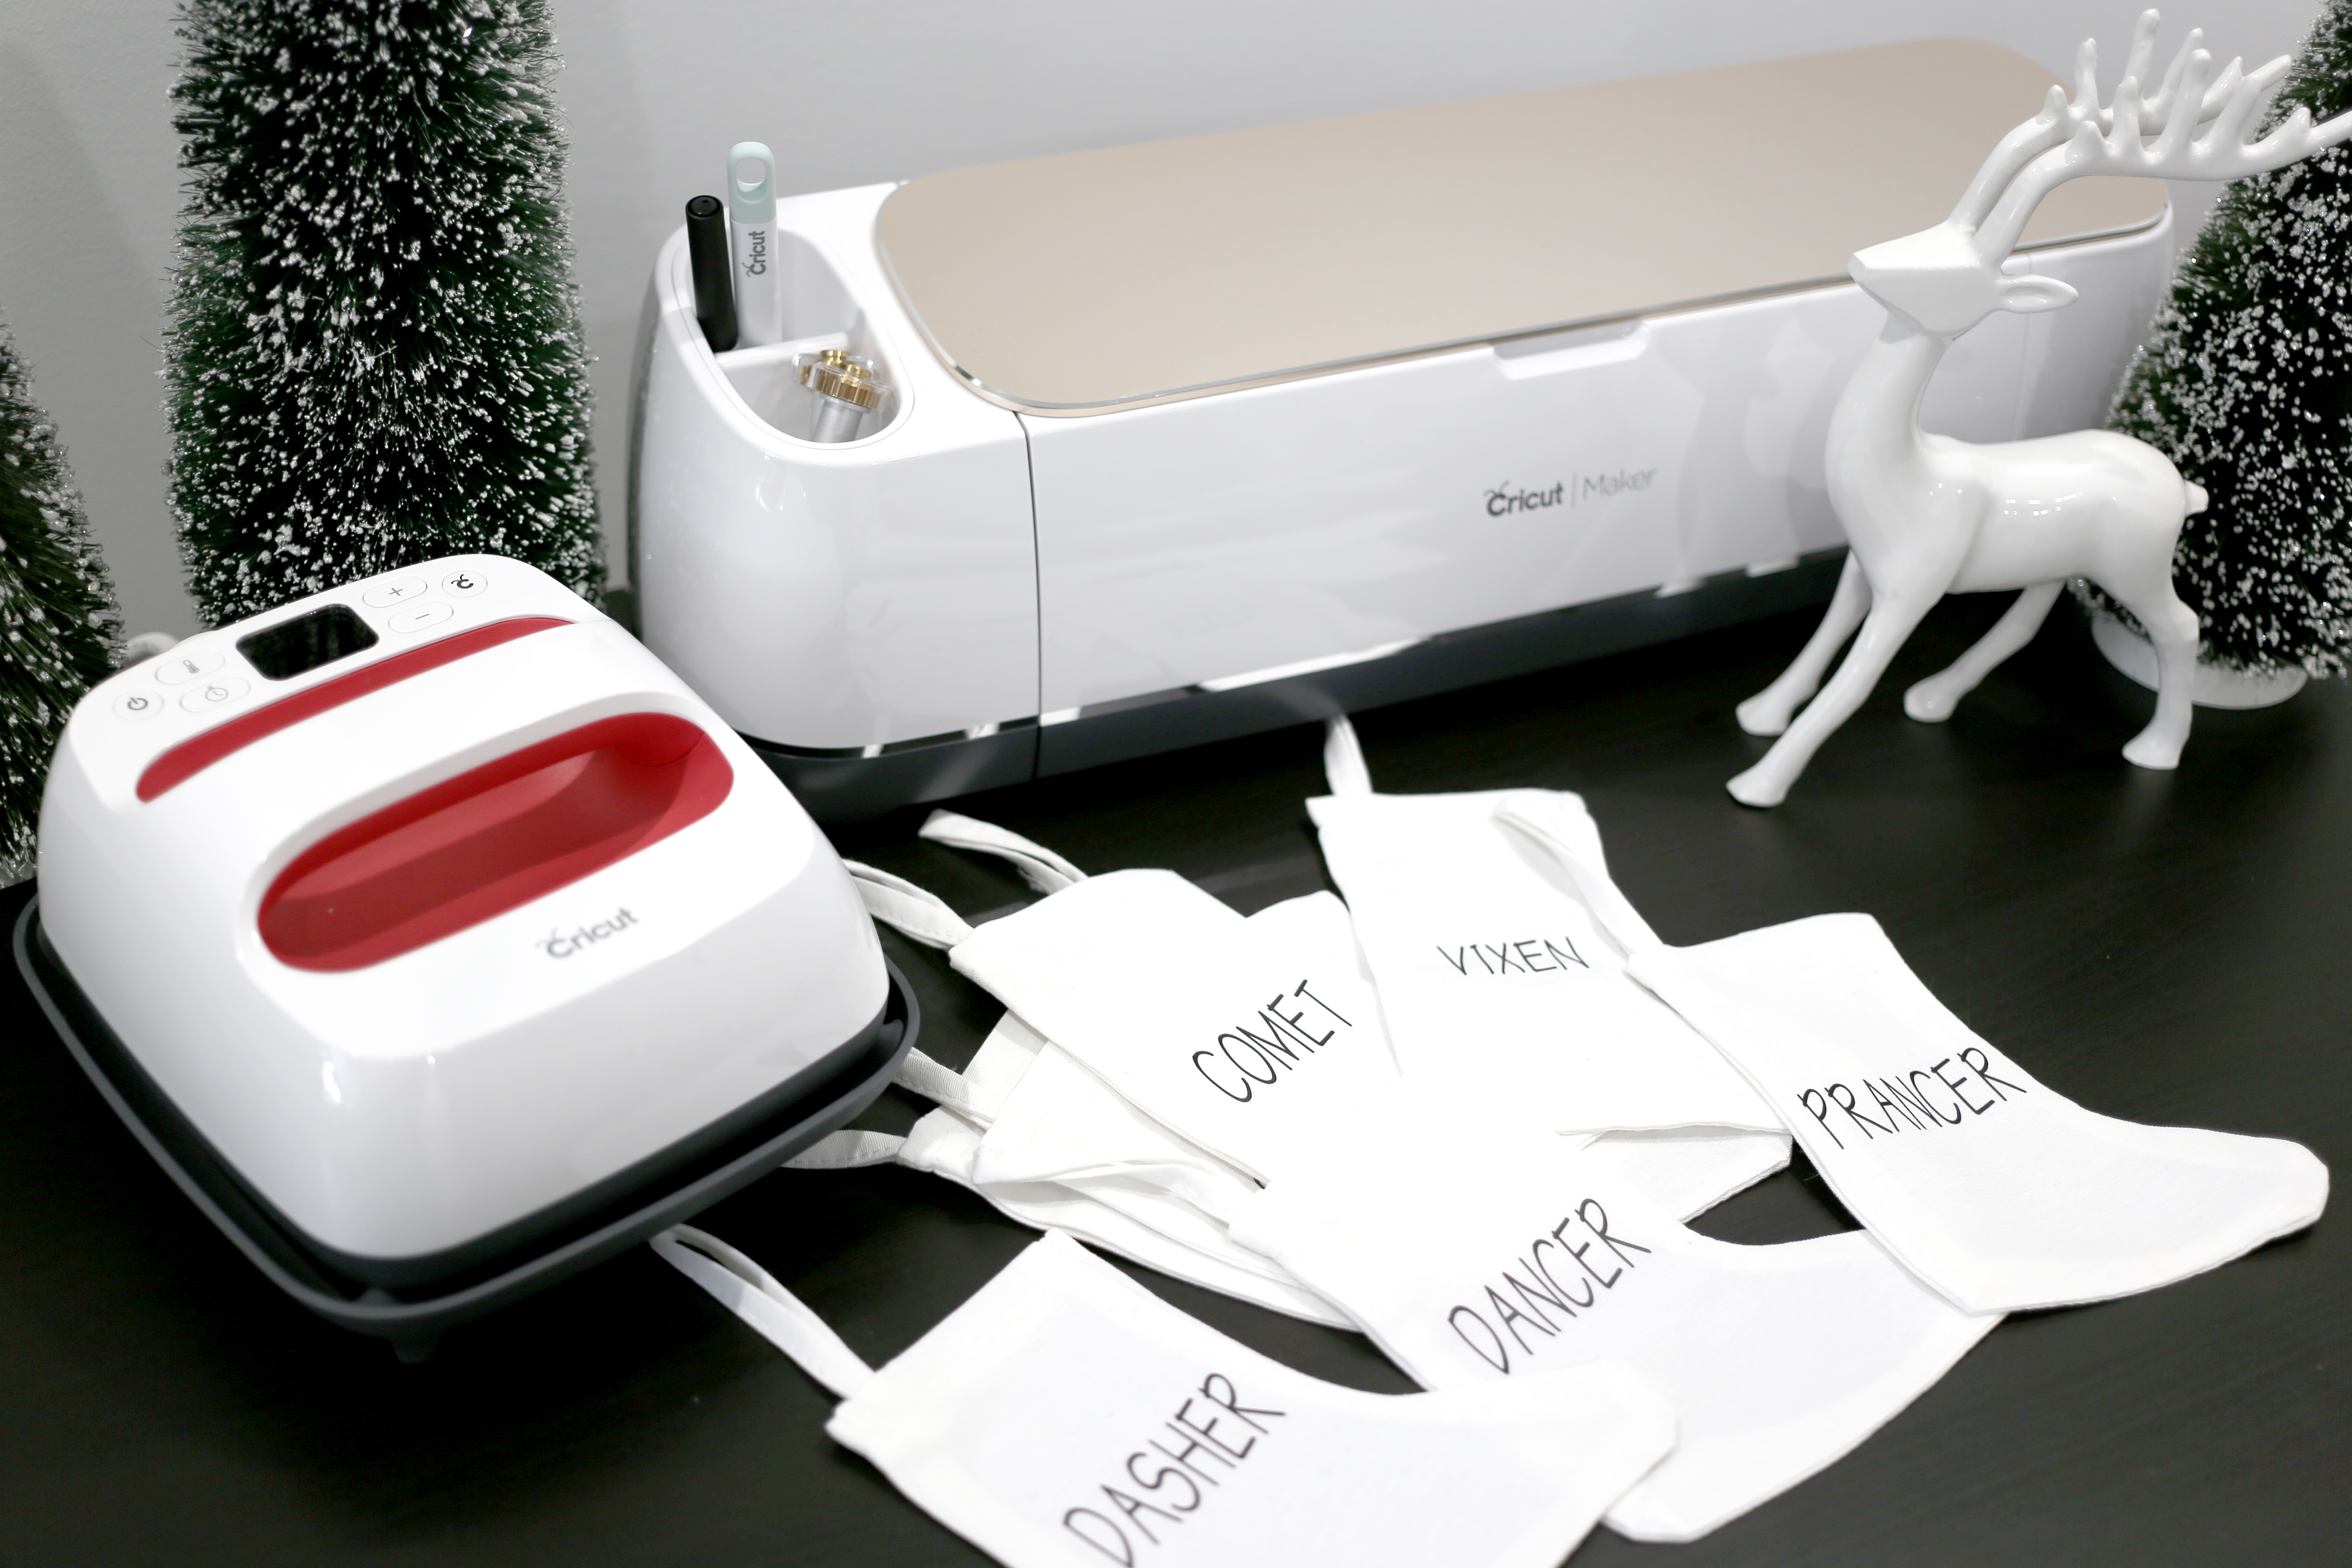
Okay, now this may not seem like a big deal to some people, but let me tell you, it is a life-saver if you make lots of iron-on projects like me. No more being frustrated when the iron-on plate doesn’t fit over a larger design I may put on a large tote bag or t-shirt. Or, if you have a smaller item like these mini stockings or baby onesies…the small size is PERFECT! Now I can use the Easy Press 2 size that fits with the project I’m working on which is so convenient! The small one is 6″x9″ (you can see how small it is compared to my hand).

LET’S MAKE SANTA REINDEER MINI STOCKINGS WITH CRICUT!
Want to see how to make these adorable Santa Reindeer Mini Stockings with Cricut? LET’S GET STARTED!
HERE’S WHAT YOU NEED:
– Cricut Maker machine – DETAILS HERE AT Cricut.com
– Cricut Easy Press 2 (small size)
– Cricut light grip mat (green one)
– Cricut black iron on vinyl
– Cricut paper trimmer or scissors
– Cricut weeding tool
– 8 mini white fabric stockings
STEP 1 – Log In to Design Space + Load This Project!
Cricut has an online interface called Cricut Design Space™ that walks you through every step of your project and has many images and ready-to-make projects that you can make without having to do the design yourself. Log in to Cricut Design Space™ and click here to make this Santa’s Reindeer Mini Stockings Project.
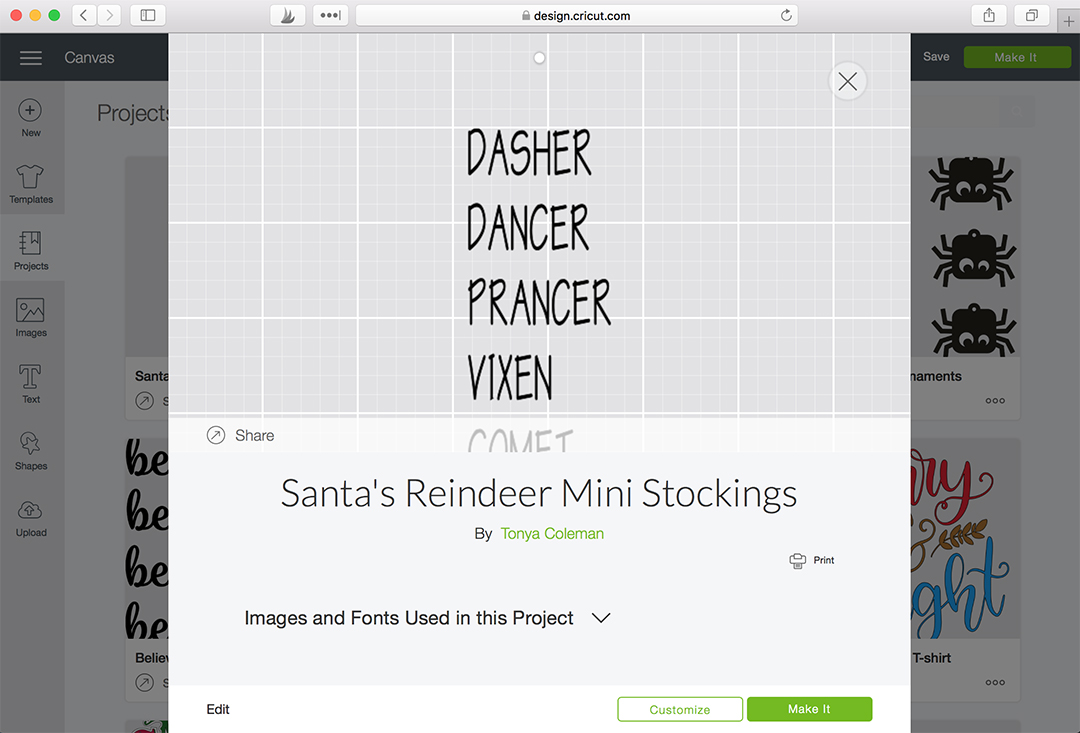
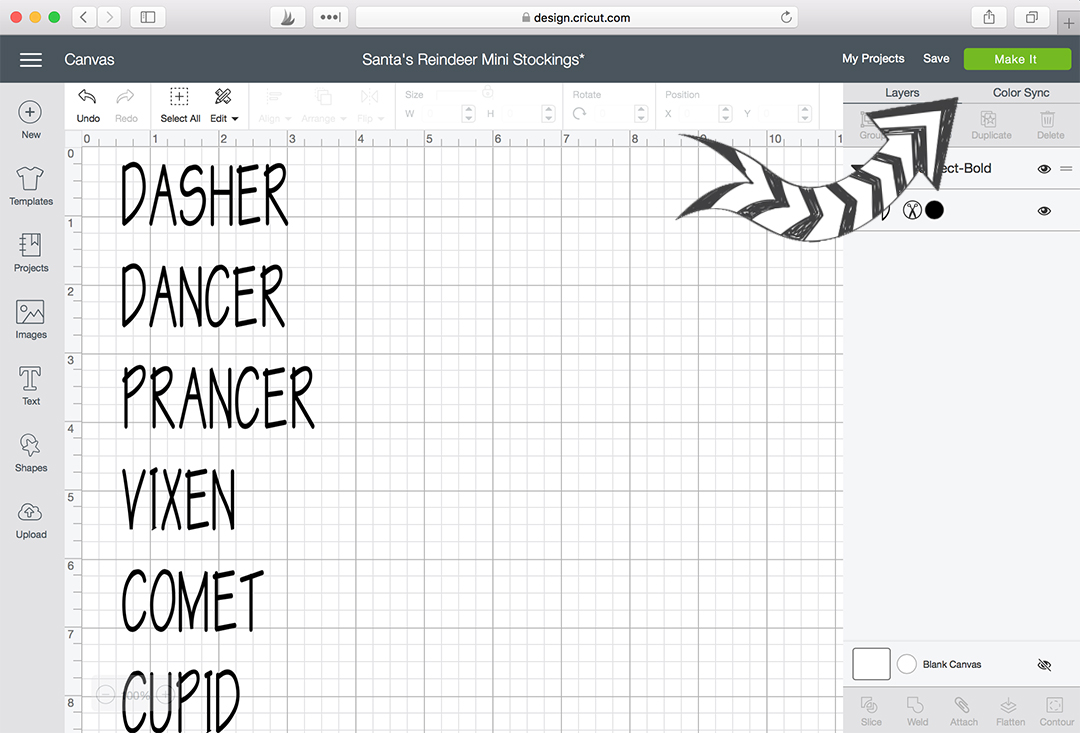
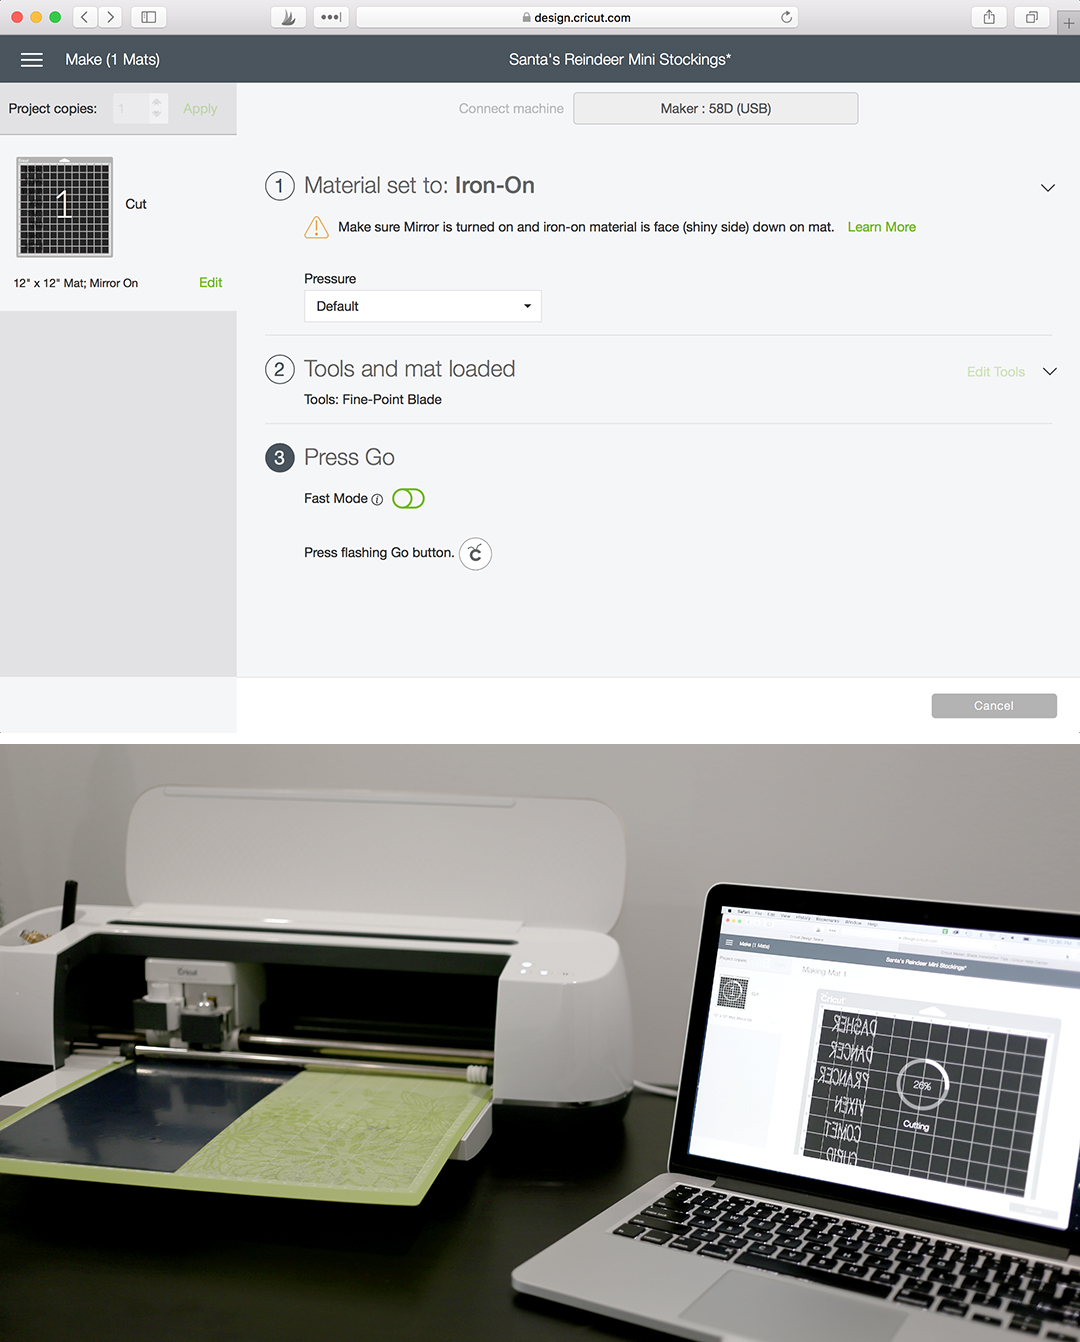
The project will load and you will see the project. Click the green MAKE IT button on the top right.
STEP 2 – Choose Your Material to Cut!
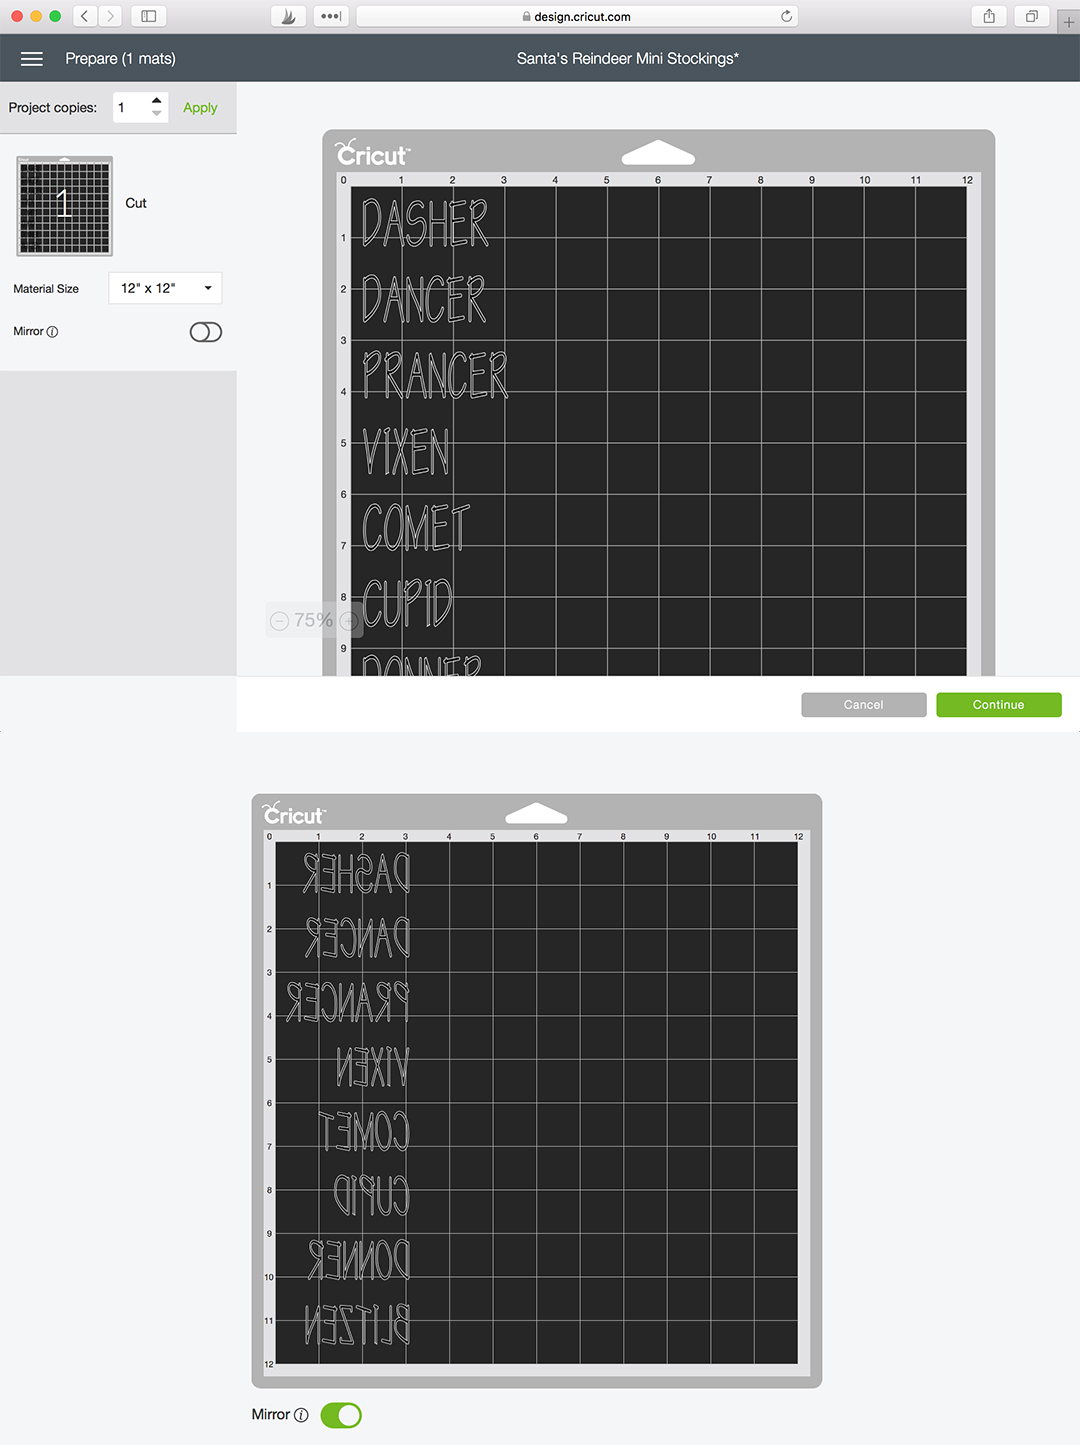
Choose Iron-On when prompted and be sure to choose the MIRROR option which you should always use when doing an iron-on. This will flip the image around to create a mirror image of it so that it is the right way once you flip it onto your fabric. Click on the green CONTINUE button.
STEP 3 – Prep Your Materials to Cut!
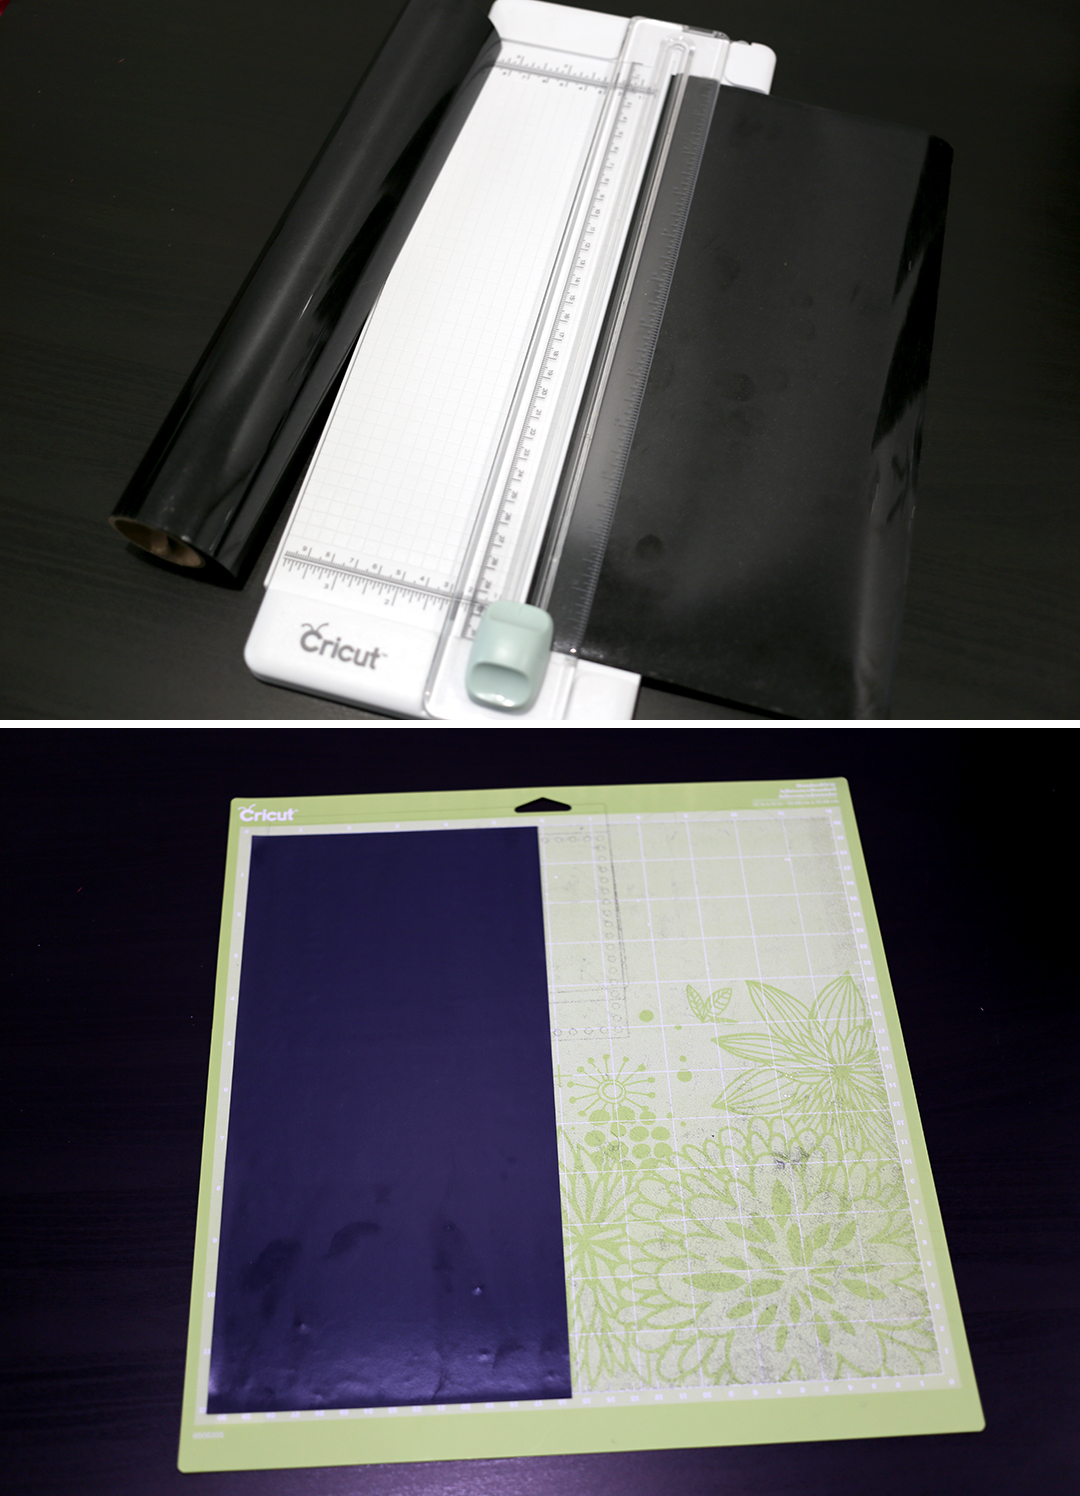
Since the names of the reindeer that we are going to cut are only a maximum width of 3″ wide, you will want to trim a piece of the iron-on vinyl to about 4″. Starting in the corner of the light grip mat, smooth down the vinyl to the mat. Be sure to place the vinyl shiny side down.
STEP 4 – Load the Mat & CUT!
Place the mat under the clips on the Cricut Maker and push slightly against the mat while you press the LOAD button on the machine. The mat will load into the machine. Then press the GO button. The project will begin to cut.
STEP 5 – Unload the Mat & Weed Your Design!
Once the cutting is complete, Press the LOAD BUTTON to unload the mat from the Cricut. Carefully remove the vinyl only from the shiny backing. Be careful not to pull the backing off of the mat yet. Using the weeding tool, remove the vinyl still attached to the insides of the letters.
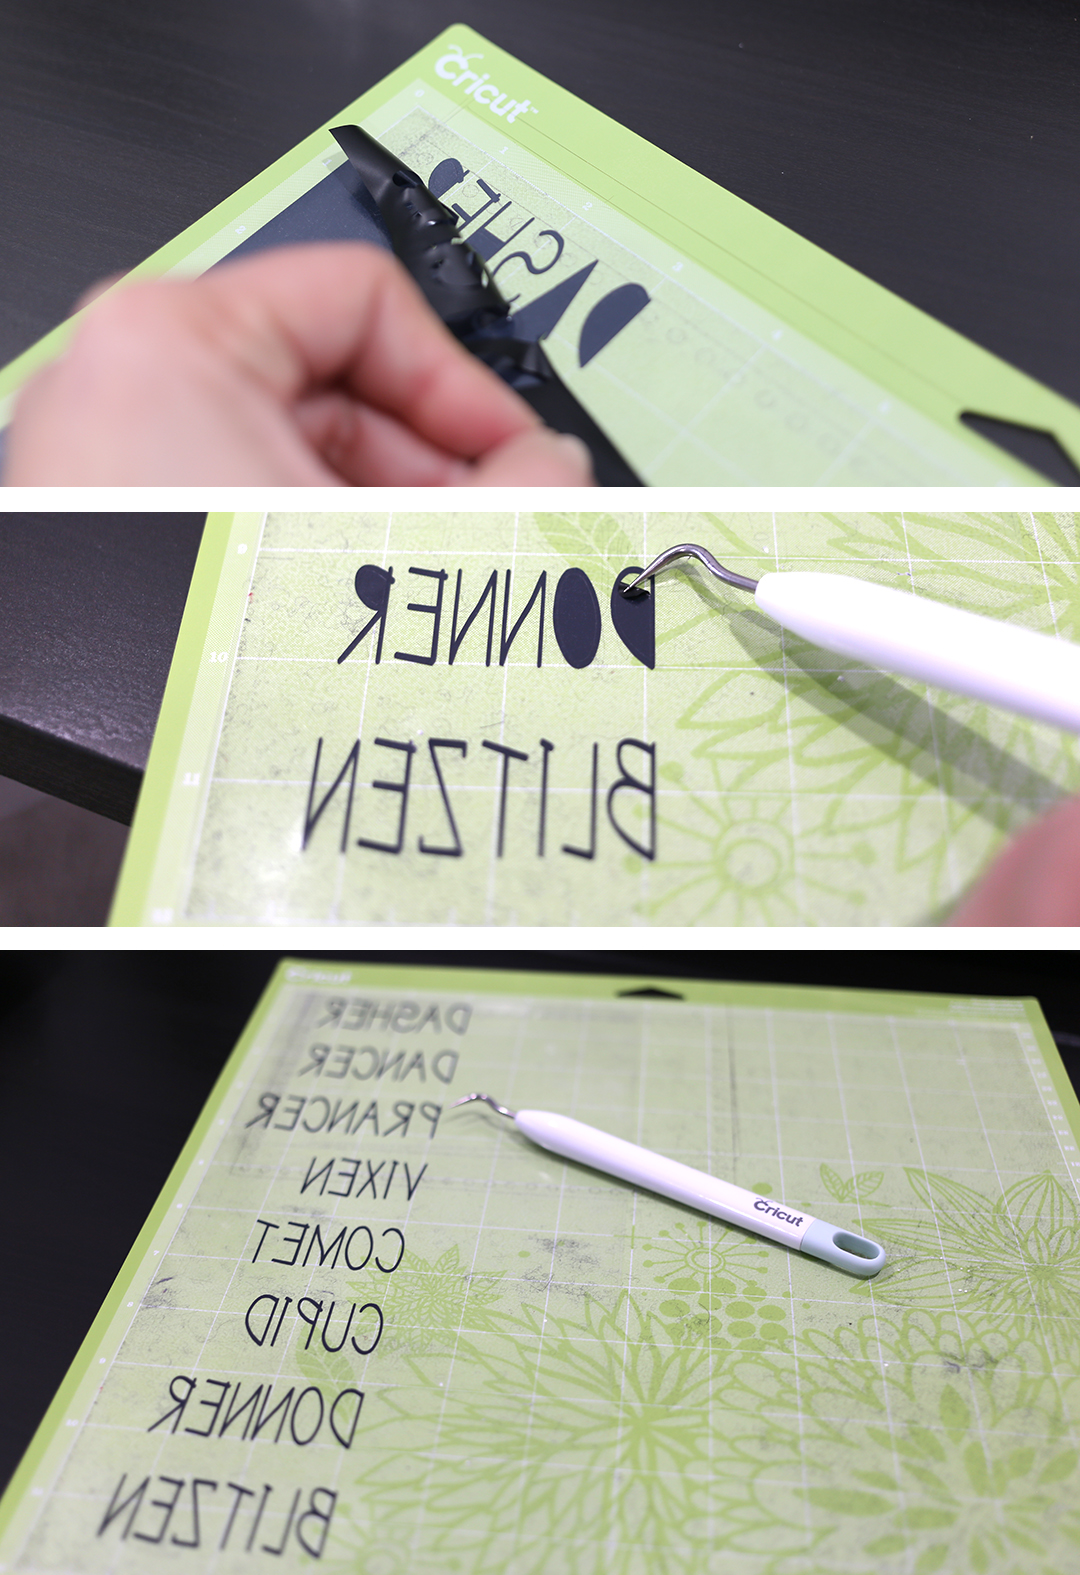
STEP 6 – Remove Your Design from the Mat!
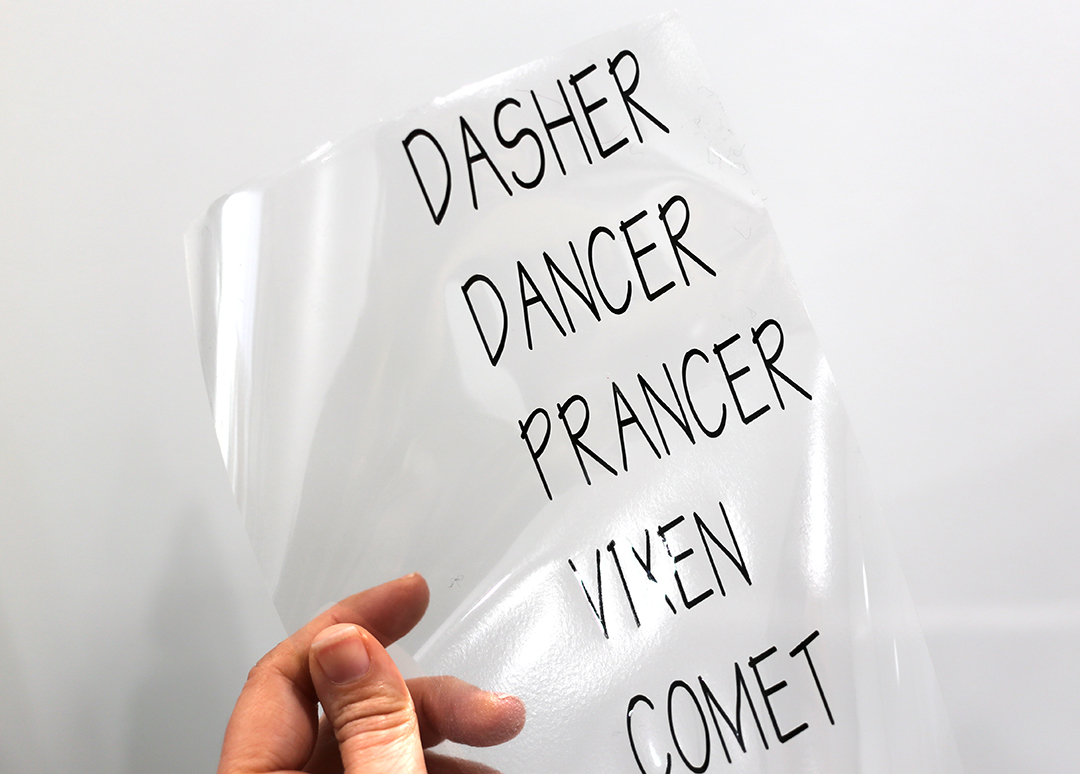
Carefully pull the clear shiny backing from the mat. Cut each name into it’s own separate piece.
STEP 7 – Prep Your Fabric for Iron-On Transfer!
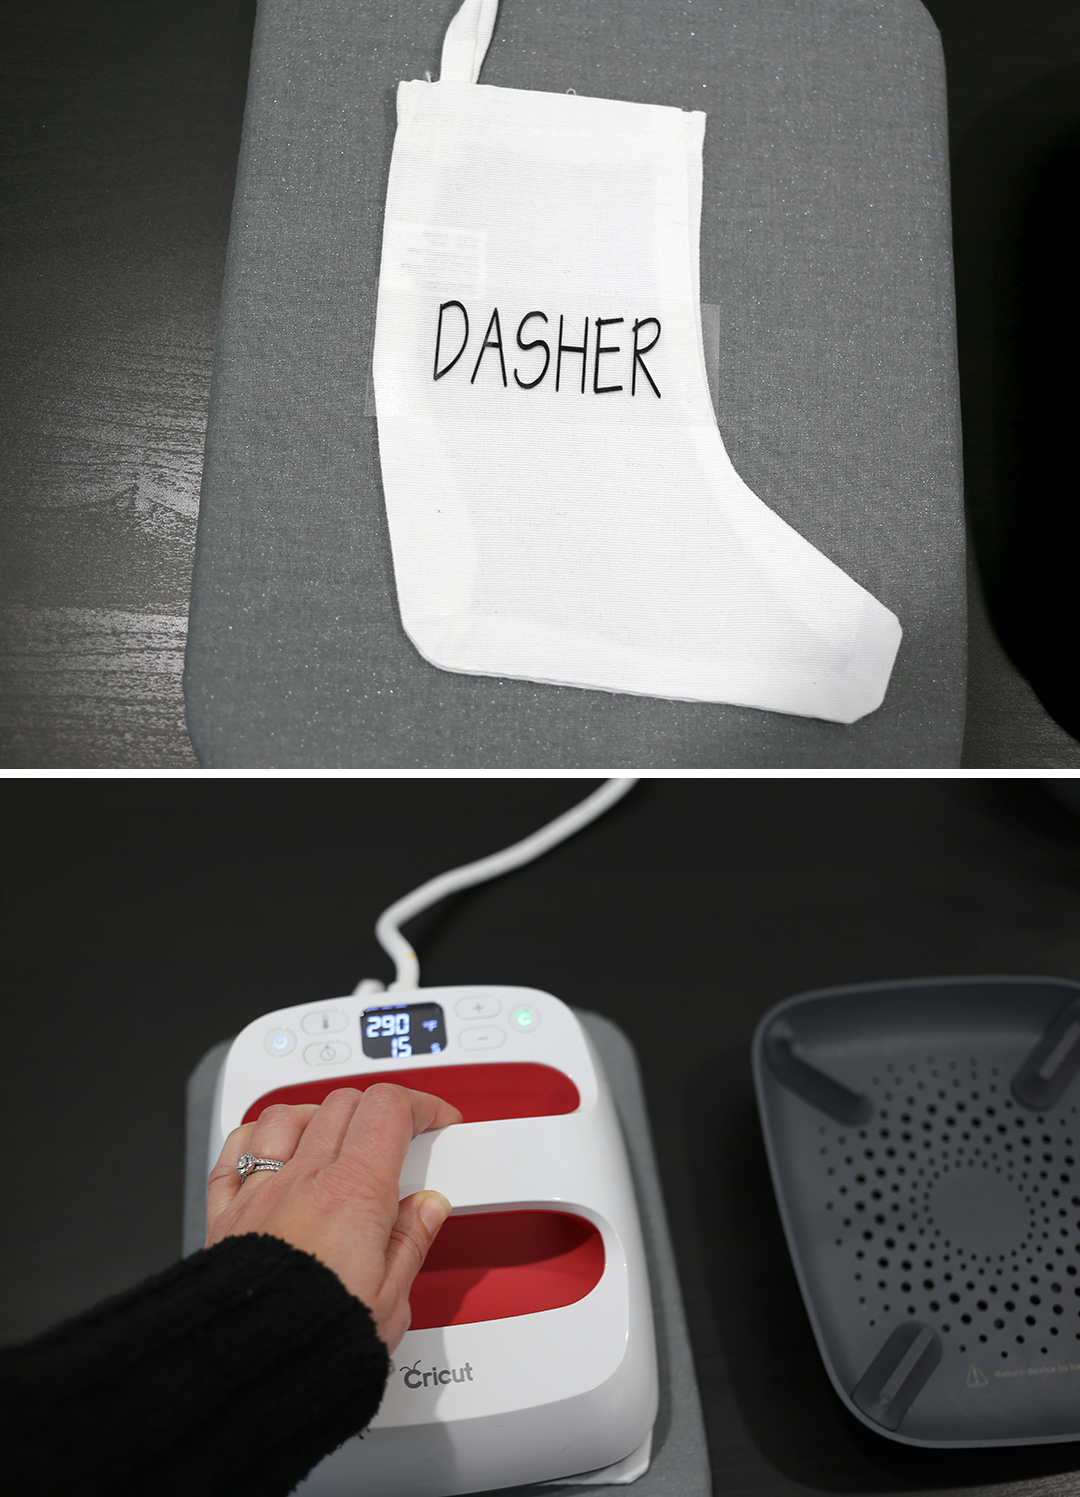
Turn on the Cricut Easy Press and set the temperature to 290 degrees. It will beep once it reaches the temperature. Place one of the mini stockings flat down on the small 8″x10″ Cricut Easy Press Mat. Place the Easy Press firmly on top of the stocking for 5 seconds to remove any wrinkles.
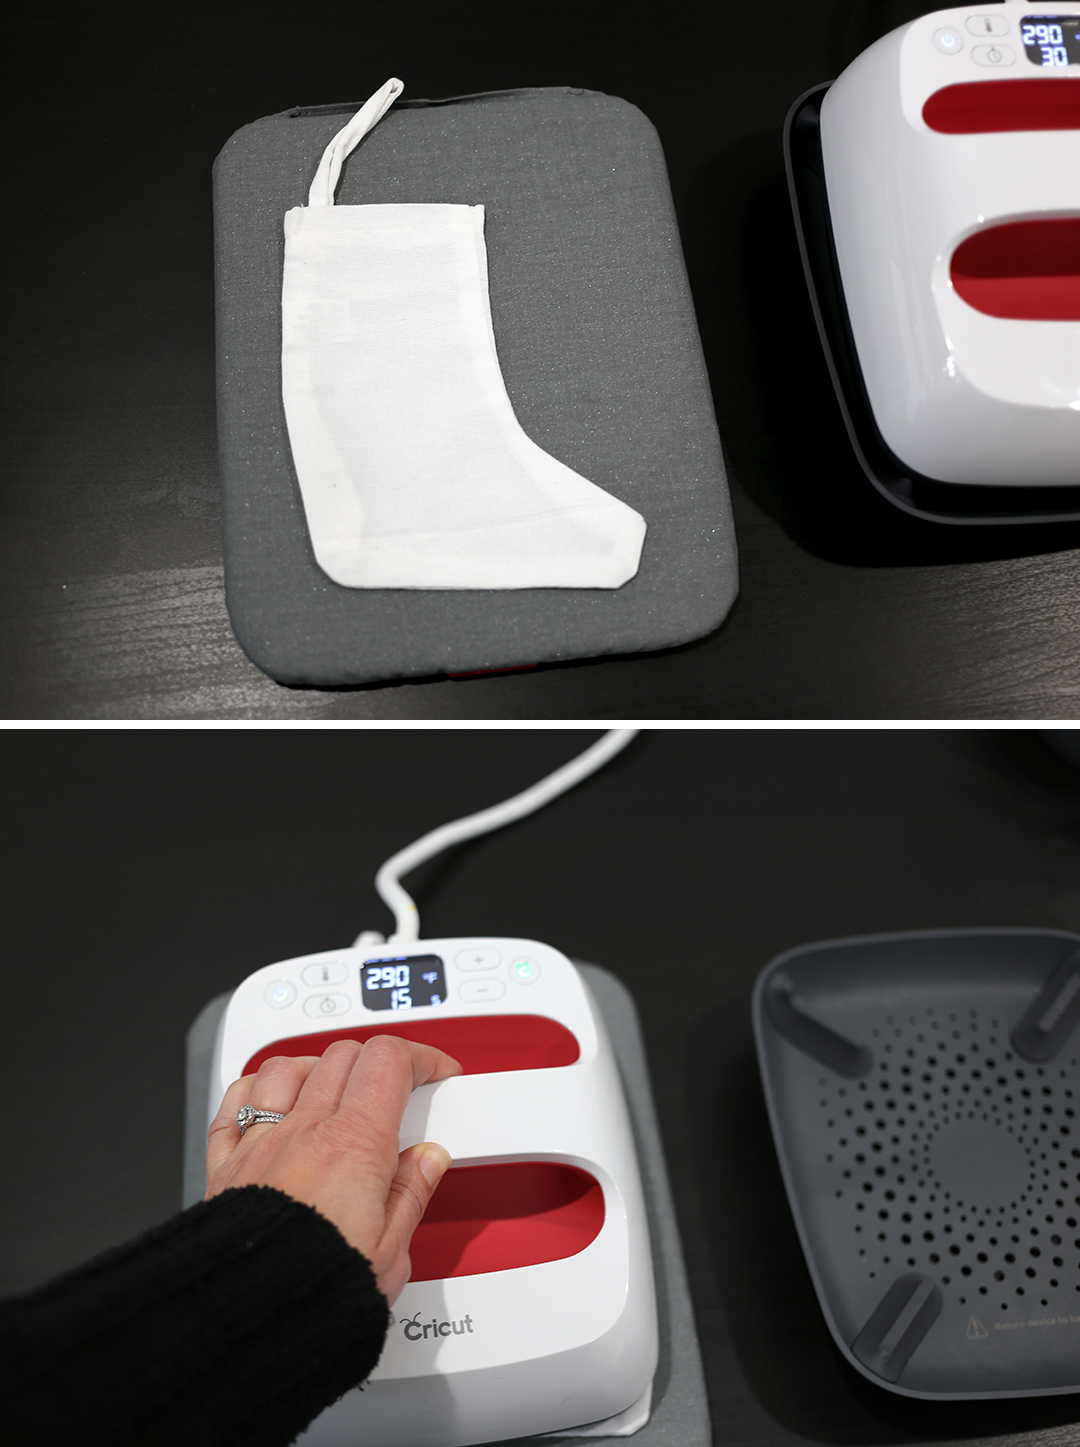
GIRLFRIEND TIP: YES, Cricut came out with Easy Press Mats in different sizes to coordinate with the Easy Press 2. Gotta love that! They are truly a must-have as you can literally use your Easy Press anywhere as long as you have the mat! No more lugging out the ironing board or using your bath towels on a counter! NO THANK YOU!
STEP 8 – Iron-On Your Design!
Place one of the reindeer names down onto the stocking with the liner side up. Set the timer on the Easy Press for 15 seconds. Place the Easy Press on top of the stocking and press the green Cricut button on the Easy Press to start the timer. It will beep when it is done.
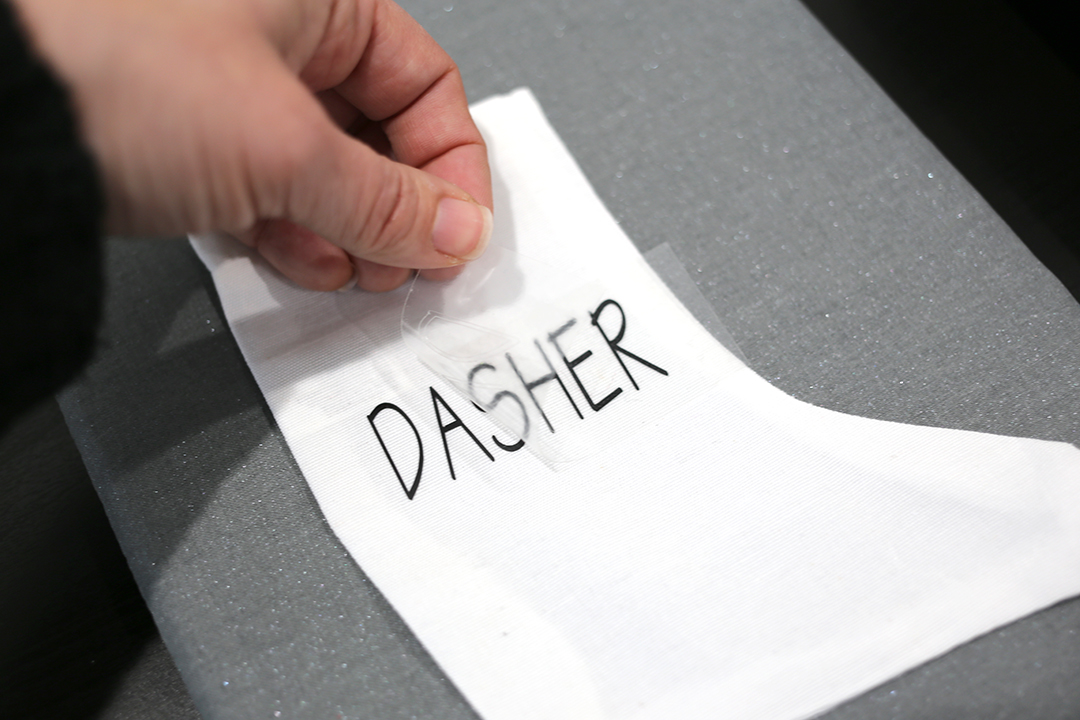
Turn over the stocking and repeat for 15 seconds. Place the Easy Press back into its docking plate then, while the stocking is still warm, gently remove the plastic liner.
Repeat Steps 7 and 8 for the rest of the reindeer names. You will have a total of 8 stockings.
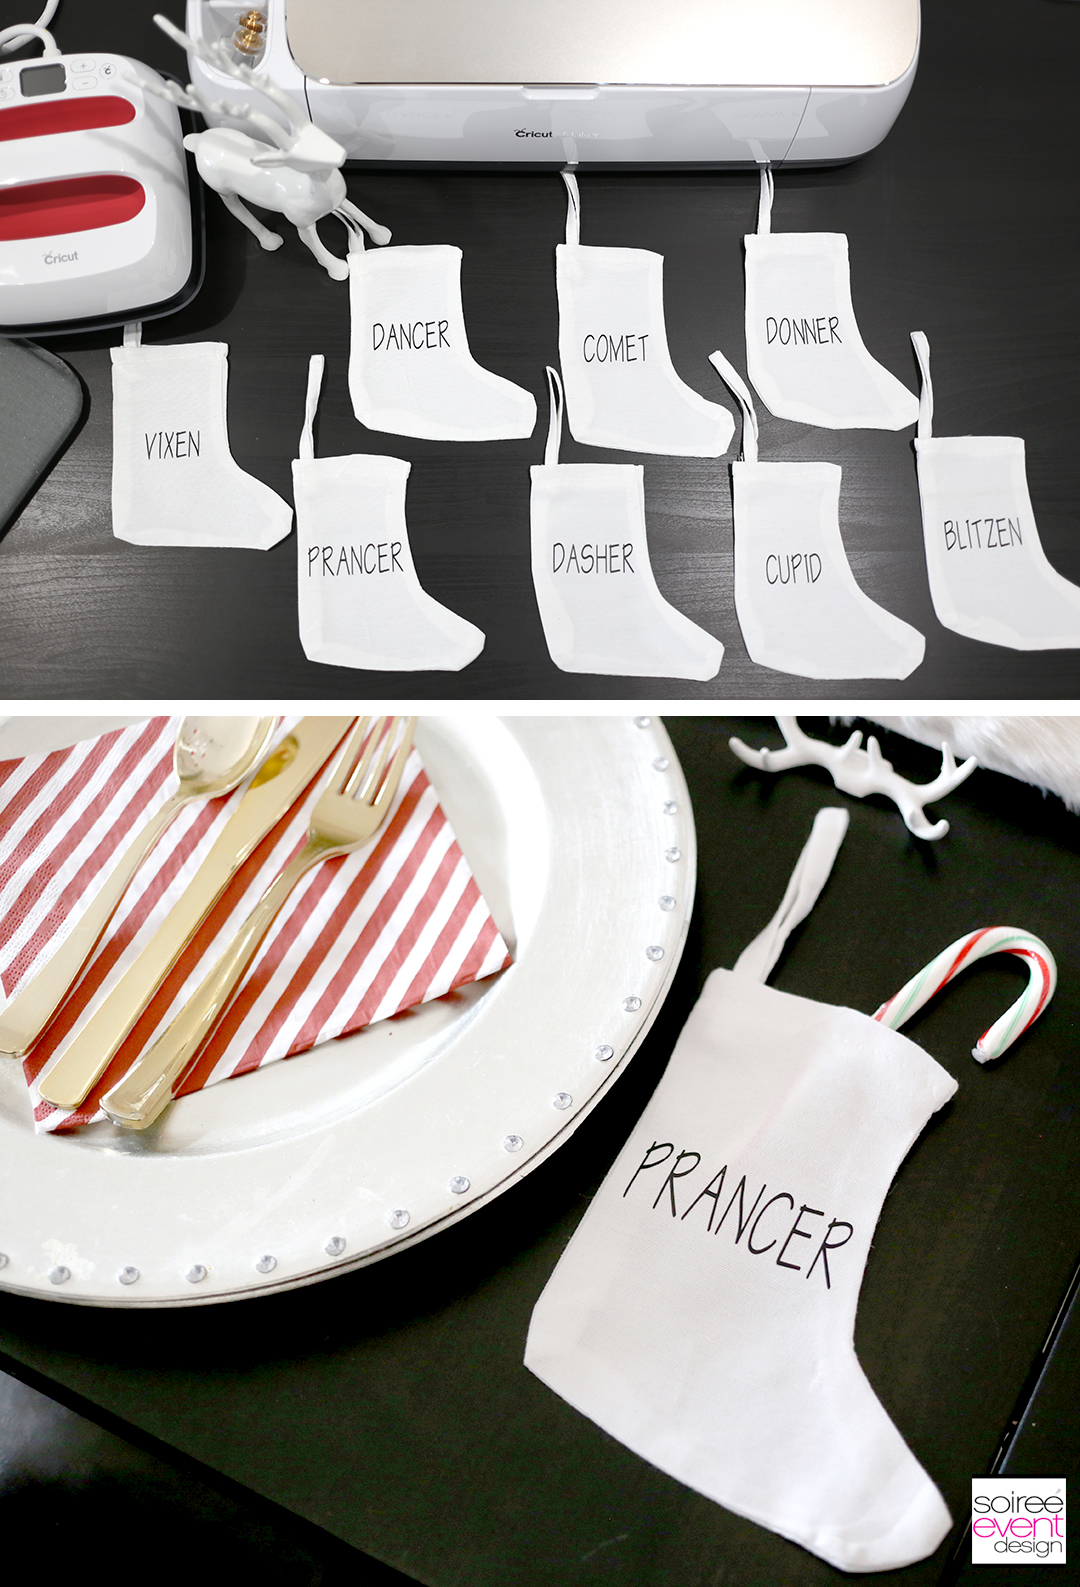
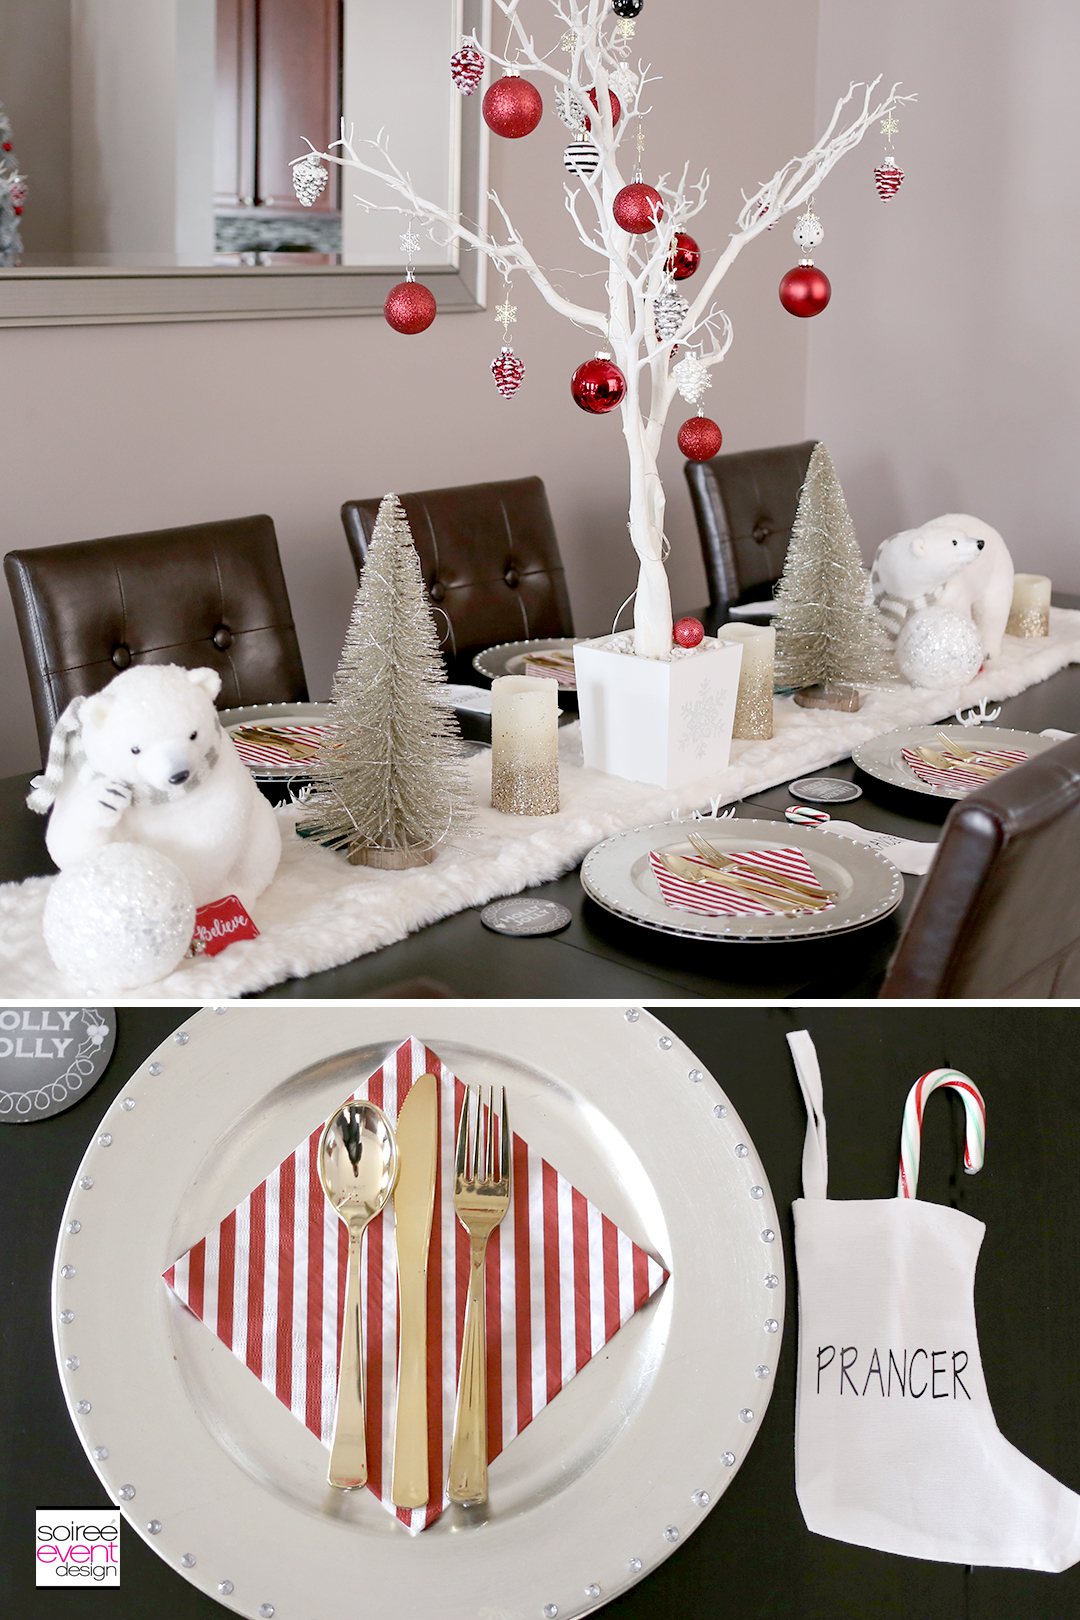
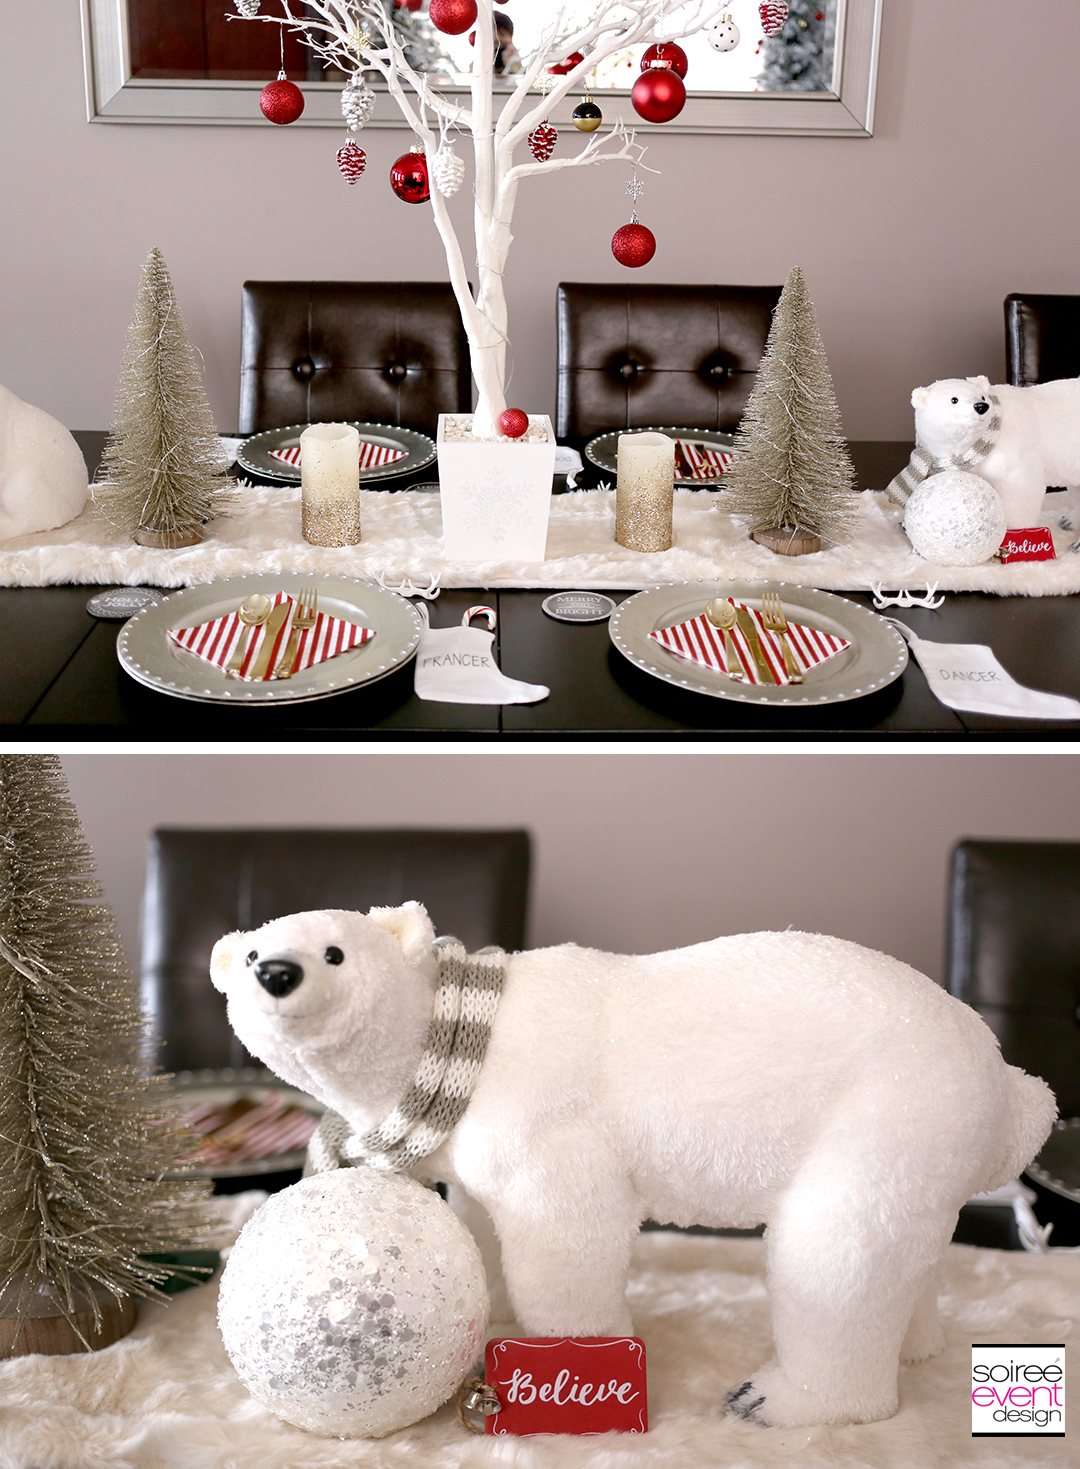
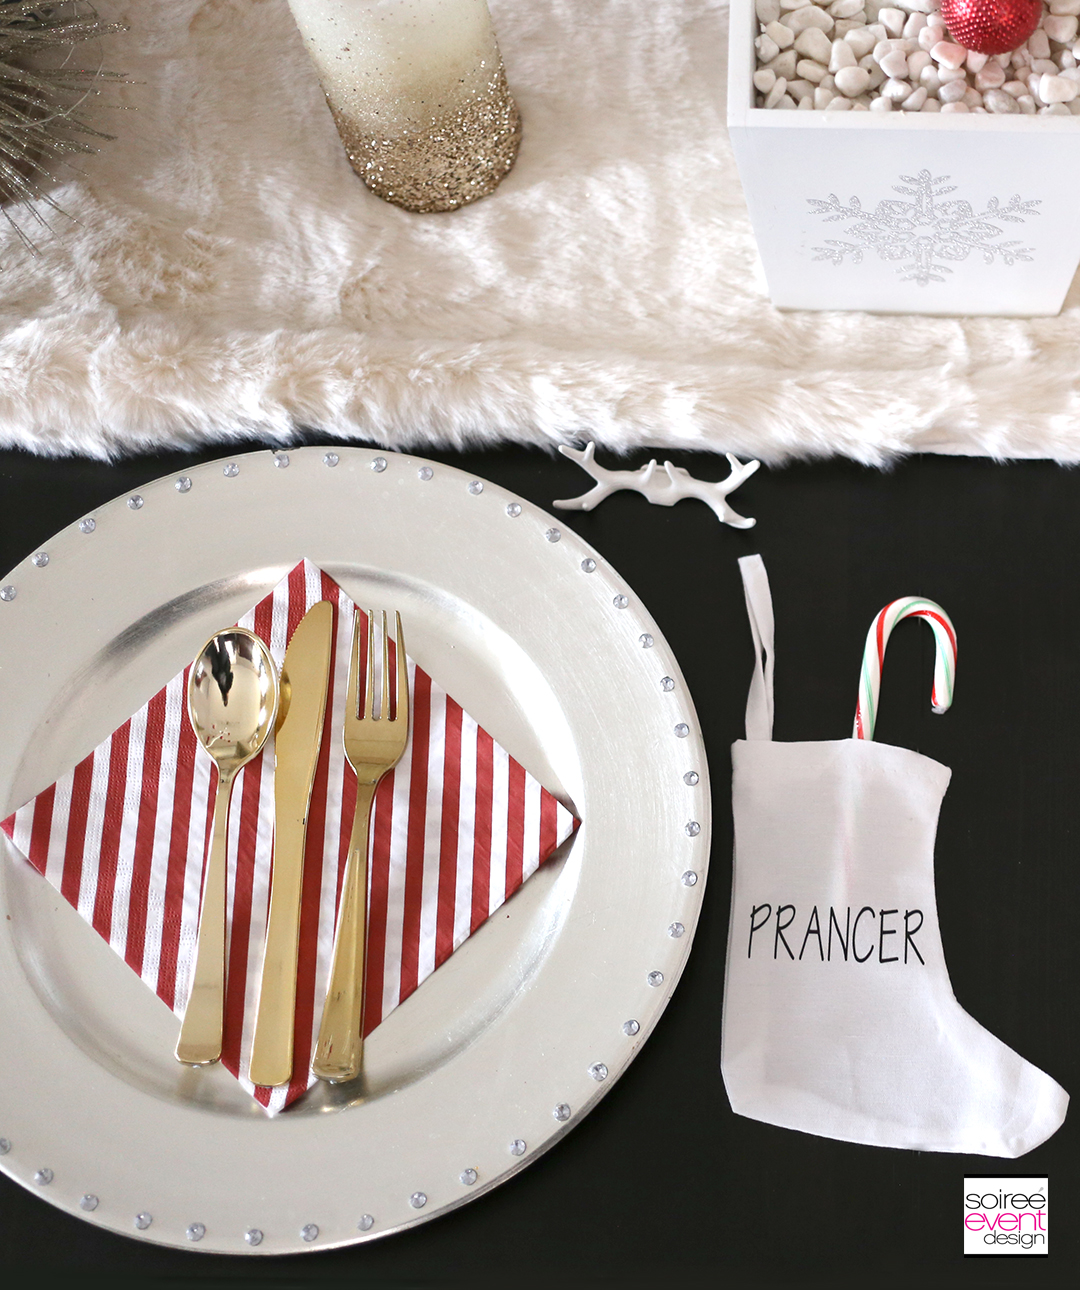
You could hang these on your tree or tuck a candy cane in them like I did and place one at each placesetting on your holiday dining table. I have my table set for 8 guests, so this was PERFECT since there are 8 of Santa’s reindeers!

PIN FOR LATER!
FOLLOW ME ON PINTEREST FOR LOTS OF INSPIRATION!
CLICK HERE to check out my PINTEREST BOARD full of recipes, parties, home decor, DIY projects and more!
WANT MORE CHRISTMAS IDEAS?
Click the links below to see lots more of my Christmas Ideas
– Rudolph Christmas Party Ideas
– Rudolph Cupcakes
– Rudolph Christmas Party Drink Station
– Merry & Bright Christmas Party
– FREE Holiday Printables
– Christmas Modern Farmhouse Stocking Mantel
– DIY Gold Paper Mini Tree Decorations
– Holiday Cupcakes & Cocktails Recipes
– DIY Black and White Christmas Wreath
– Black and White Christmas Tablescape
– Christmas Gift Wrapping Party
– DIY Woodland Christmas Wreath
– Christmas Gift Wrapping Tips
– Decorate Mini Christmas Trees
– Happy Howlidays Monster High Party
– Woodland Wonderland Party + FREE Printables
– Rustic Chic Christmas Decorations
– Modern Glam Christmas Decorations
– Holiday Favorite Things Party
– Red and White Christmas Party + FREE Printables
– Gold and White Christmas Kids Table
– Pudding and Cookies Christmas Dessert Table
– Holiday Tween Crafting Party
– Gold and White Christmas Tablescape
– Modern Outdoor Holiday Decor
– FREE Holiday Printables
– Christmas Eve Dinner Party + Coffee Bar
– Gingerbread House Decorating Party
– Grinch Themed Christmas Party
– Holiday Mocktails Recipes
– Holiday Personalized Pajamas
– OREO Cookie Balls + Decorating Party
DON’T MISS A THING!
Be sure to SUBSCRIBE to my blog so you can get all my blog posts delivered right to your email’s inbox so you won’t miss a thing! Subscribing is easy! Just enter your email address in the above right corner of this page and be sure to confirm your email once you get our confirmation to your inbox! That’s it! AND…you’ll get a code for 10% off your next order in our shop. YUP…GOTTA LOVE THAT!
*****
All photos and text in this post are copyrighted to Soiree Event Design and may NOT be copied from this site and used in any way without permission from the owner. Pinning images, of course, is allowed and encouraged.
This is a sponsored conversation written by me on behalf of Cricut. The opinions and text are all mine.
Love the inspiration and design of that wrapping paper! The mini stocking came out amazing. Also a huge fan of the way you mixed gold and silver…it can be done, and this proves it!
Thanks so much!!!