Hey party peeps!
Teenage Mutant Ninja Turtles or TMNT are ALL THE RAGE right now!
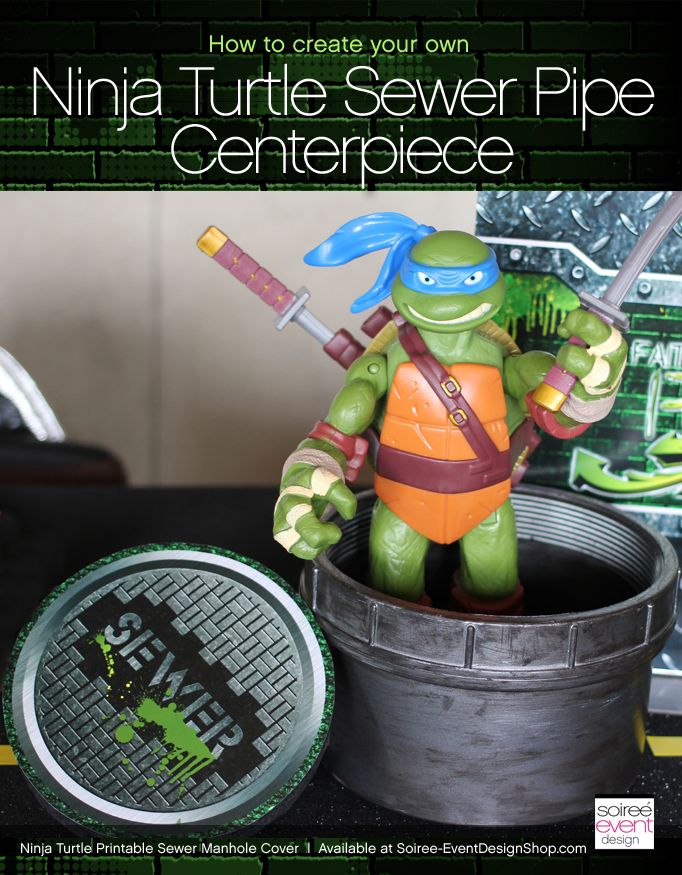
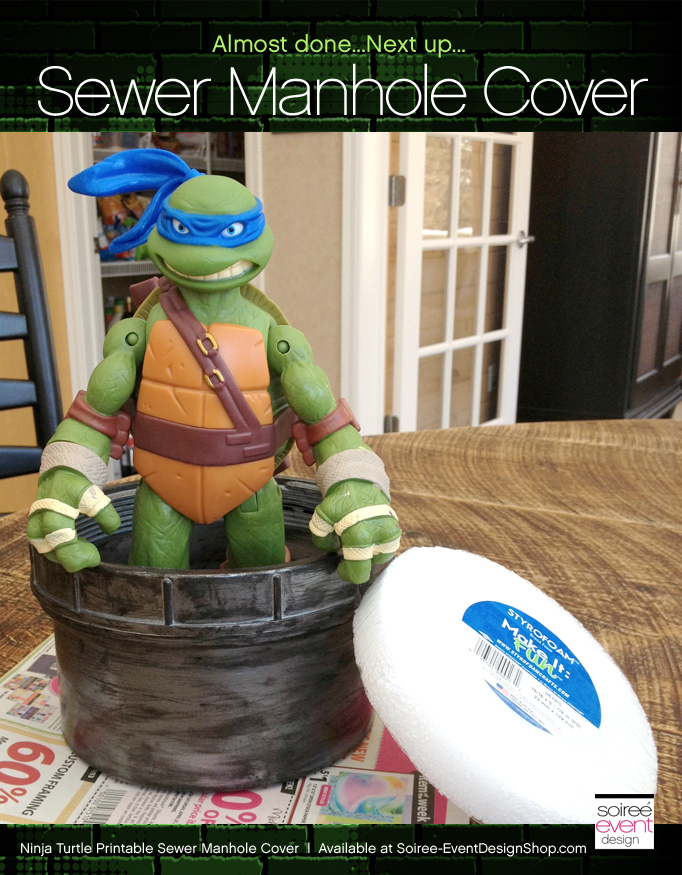
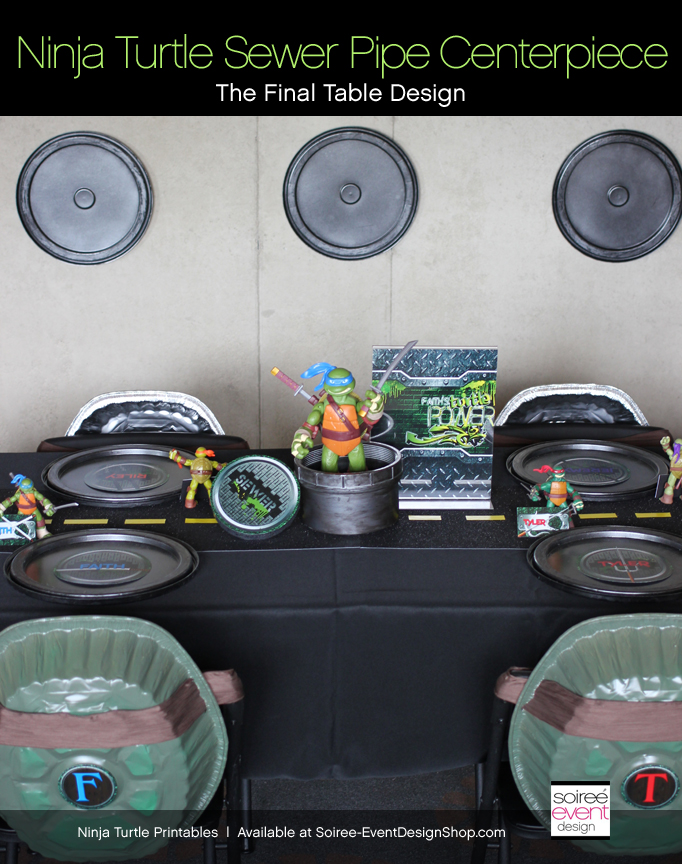
Today I’m sharing our tutorial for how to make that FABULOUS Teenage Mutant Ninja Turtles Sewer Pipe Manhole Cover Centerpiece! We all know that Teenage Mutant Ninja Turtles live in the sewers of NYC, so we decided to create the effect of a turtle coming out of a sewer pipe that looked like it came right out of the middle of the dining table. To complete the look, we created a 3D sewer manhole cover that sat to the side of it as if Leonardo himself just pushed it aside to rise from the sewer! How cool is that!
For this post, I had the AMAZING talents of my newest member to the Soiree Event Design team, Katie Driver! She and I came up with some fabulous decor ideas and then she went to town creating these awesome DIY projects for the party taking ordinary items and making them EXTRAORDINARY! Super easy that even I can do them!
CLICK HERE TO SEE THE NINJA TURTLE PARTY with party details including the dining table with turtle shell chairbacks!
CLICK HERE TO SEE HOW TO MAKE THOSE NINJA TURTLE SHELLS
CLICK HERE TO SEE HOW TO MAKE THE NINJA TURTLE PIZZA BOXES
CLICK HERE TO SEE HOW TO MAKE THE NINJA TURTLE SEWER MANHOLE COVERS
Today…it’s all about the iconic TMNT SEWER!
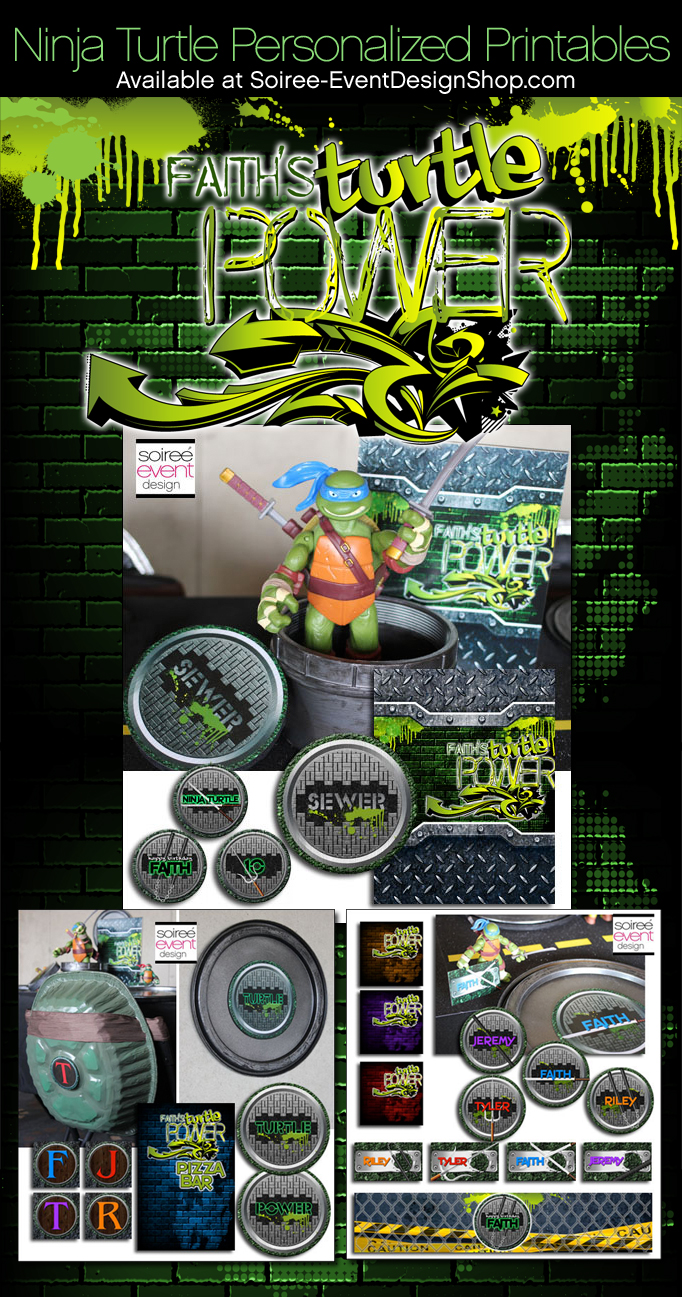
It’s simple…Here we got creative transforming ordinary items like a PVC pipe and styrofoam disk into a WOW-FACTOR Centerpiece! The finishing touch came with our AMAZING Exclusive Personalized Printables AVAILABLE NOW IN OUR SHOP HERE!
HERE’S WHAT YOU’LL NEED:
• 6″-8″ diameter PVC plastic pipe (available at your local hardware store)
• Metallic silver spray paint
• Black acrylic paint
• 6″ styrofoam disk (available at Michaels or the Dollar Tree)
• sandpaper
• Ninja Turtle printable Sewer Manhole Cover (available here)
HERE’S HOW YOU DO IT!
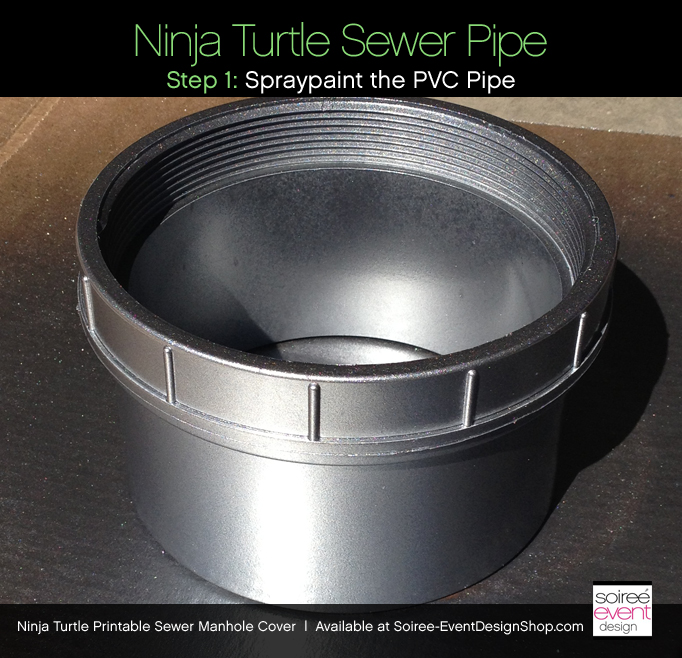
Step 1: CLEAN & PAINT THE PVC PIPE
Wipe pipe clean of any residue or dust. Paint the pipe with the metallic silver spraypaint. When painting plastic, light, thin coats are best. This will result in an even coat with no runs. Make sure to hold the spray can 8”-12” away from the pipe and build layers as they dry.
GIRLFRIEND TIP: When spraypainting an object, it is super helpful to place your object on top of an old lazy susan so you can easily rotate the item as you’re painting it so you can cover the piece completely.
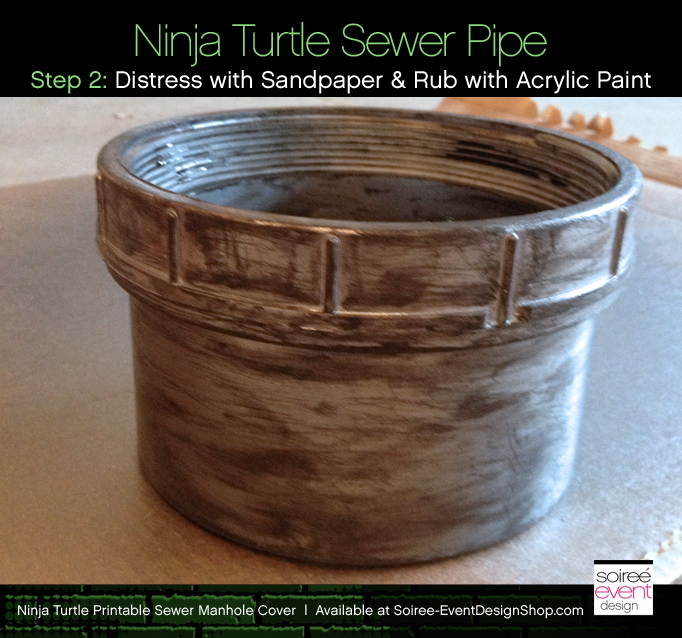
Step 2: ROUGH IT UP WITH SANDPAPER & RUB WITH PAINT!
Once the pipe has dried completely, use sandpaper to gently rough up the PVC pipe in some places to expose some of the white plastic below the paint. Then dab an old rag into some black acrylic paint and rub the paint on the PVC, filling the scratches on the pipe. Using a clean rag, remove the excess of the black paint. Let dry for 24 hours to allow the two different types of paint to cure together.
GIRLFRIEND TIP: Be sure to only rough up a few spots to give the piece a weathered, grundgy look.
ALMOST DONE!…NEXT UP…THE 3D SEWER MANHOLE COVER!
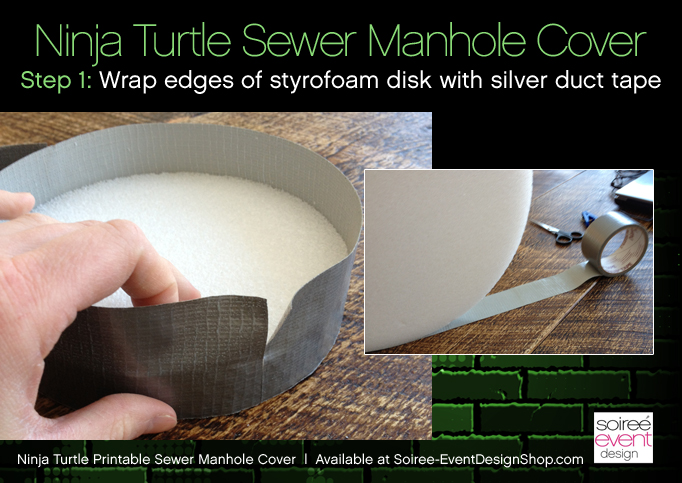
Step 1: WRAP THE STYROFOAM DISK WITH SILVER DUCT TAPE!
Roll the disk on to the duct tape keeping one edge of the disk even with the edge of the duct tape. This will leave a clean edge on one side of the disk and a lot of overlap on the other side. Fold down the excess so it is flat on the one side.
GIRLFRIEND TIP: This step is important as you want there to be extra overlap so that when you place the printable on to that side you won’t see any of the white styrofoam around the edges of the printable.
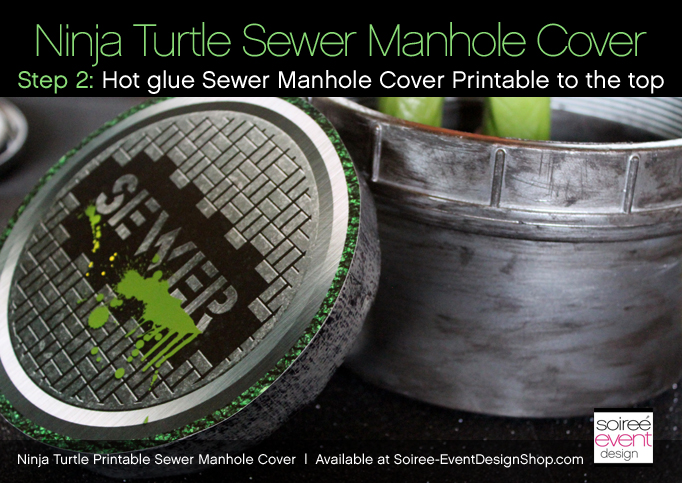
Step 2: HOT GLUE THE SEWER MANHOLE COVER PRINTABLE TO THE DISK!
Center the printable over the disk and hot glue in place. The silver duct tape can be showing around the edges of the printable.
GIRLFRIEND TIP: The printable and disk are both 6″ so be sure to trim the printable a little bit smaller so it won’t hang over the disk. As a finishing touch, take a black sharpie marker and rough up the duct tape around the edge of the disk to give it a grundgy look.
NOW FOR THE FINISHING TOUCHES!
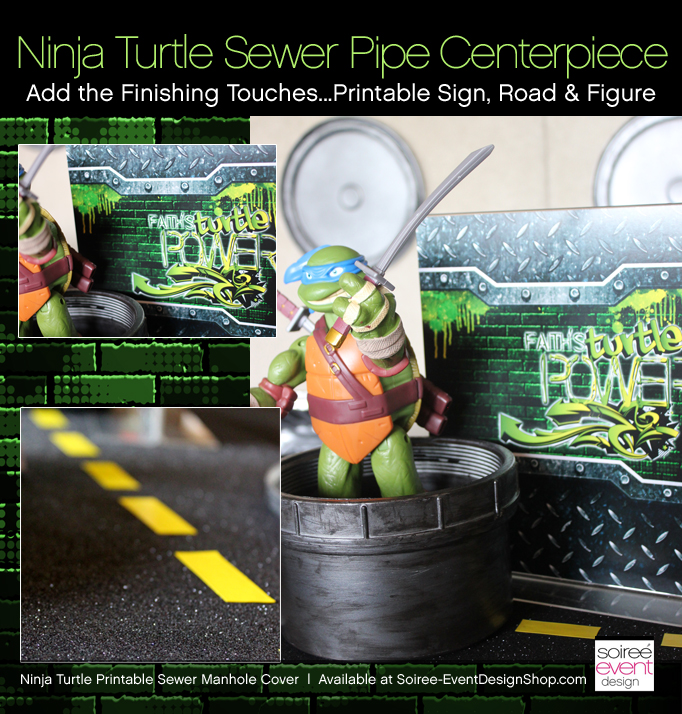
CREATE A STREET FROM SCRAPBOOK PAPER & ELECTRICAL TAPE!
To complete the look we were going for with the sewer pipe coming out of a street, we had to create a street, so we placed 6 sheets of black glitter scrapbook paper next to each other down the length of the table. To complete the look we cut strips of yellow electrical tape and placed them on top of the paper lengthwise to create the lines in the street.
GIRLFRIEND TIP: For a 6′ table you will need 6 sheets of 12×12 scrapbook paper to run the full length of the table perfectly WITHOUT having to trim any excess! Gotta love that! Also, to keep the paper in place, secure them together at the seams with masking tape UNDER the paper.
ADD A JUMBO TMNT TURTLE ACTION FIGURE AND PRINTABLE TABLE SIGN TO COMPLETE THE LOOK!
Adding the jumbo Teenage Mutant Ninja Turtle was essential! I used my daughter’s favorite turtle for this. Adding the table sign added some graphics to the background of the centerpiece.
GIRLFRIEND TIP: The jumbo figure isn’t cheap! It runs around $24 so I would suggest getting your child’s favorite one and give it to them as a present after the party!
I hope this idea has inspired you to create you own Teenage Mutant Ninja Turtle party decorations! Check back later this week where we show you how to make our TMNT Manhole Cover Chargers and Wall Backdrop seen above.
Want to see more of our TMNT party pics…click here!
Want to get more of my tips? Be sure to SUBSCRIBE to my blog so you can get all my blog posts delivered right to your email’s inbox so you won’t miss a thing!
Subscribing is easy! Just enter your email address in the above right corner of this page and be sure to confirm your email once you get our confirmation to your inbox! That’s it!
Cheers!
Tonya

This is the coolest thing I have seen all day! My kids LOVE TMNT and I have a birthday coming up. I have to give this a try. Thanks! Excellent ideas.
Love all of this! My son is 8 & has lived the ninja turtles for years. Where did you find the battery operated lights over the posters?
Hi there. I found them online at Walmart!
where did you get the sword lamp? I l need that!
How did you make the brick panel?
That brick panel wall was purchased at a hardware store similar to Home Depot.